Apple released OS X Mavericks free for all Mac user you can download it from App Store and update your current version of OS X to Mavericks. In this guide you will learn how to Make OS X Mavericks Bootable USB Drive.
Why make a bootable USB drive?
The reason to create a USB drive is you don’t need to download OS X each time when you want to install OS X Mavericks on single or multiple Mac computers. OS X Mavericks file size is approx. 5.31 GB and you should save time and your bandwidth as well. Off course you will have backup and can perform clean intall any time if your Mac experiencing problems.
Requirements:
- You need to download OS X Mavericks from App Store, you will find download link below in steps.
- You must have a 8GB USB drive, that will be formated and please save your data from USB.
Make OS X Mavericks USB
Download OS X Mavericks on your mac, here is direct download link. it may take more than an hour to download this depending on internet speed.

You will see icon like this when downloading starts.

When you just finished downloading and see the setup OS X Mavericks screen, minimize it.

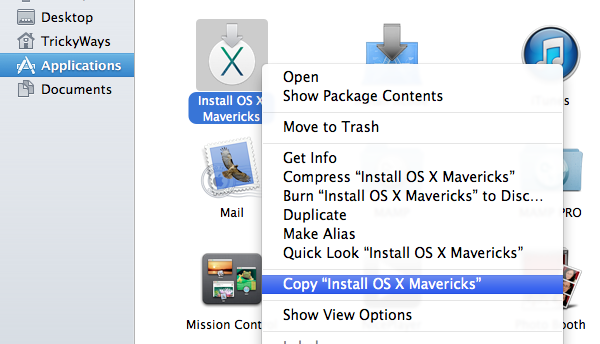
Go to Applications folder and copy the downloaded “Install OS X Mavericks.app” file to “Desktop” as shown below
Make OS X Mavericks Bootable USB Drive
Now plug in 8GB of USB drive into your Mac USB port. You will see a drive icon on your Mac Desktop, Rename drive to usbdrive (select the drive icon and then click on its name text to rename it )
ALERT: everything from your USB drive will be erased so before going to the next step make sure you save your data from USB drive first.

Run Terminal from “Applications” or find it in “Spotlight” by pressing cmd+space keys.

Copy and paste the following command in “Terminal” window.
sudo /Users/TrickyWays/Desktop/Install\ OS\ X\ Mavericks.app/Contents/Resources/createinstallmedia --volume /Volumes/usbdrive --applicationpath /Users/TrickyWays/Desktop/Install\ OS\ X\ Mavericks.app --nointeraction
Edit command text:
replace TrickyWayswith your Mac user name.
usbdriveis drive name that you plugged in.
so make sure you are using your own username and drive name in the command sytax.Above command is explained more at the bottom of this guide.
When you run this command in the Terminal you may asked to enter the administrator password, so type the password and hit return key.
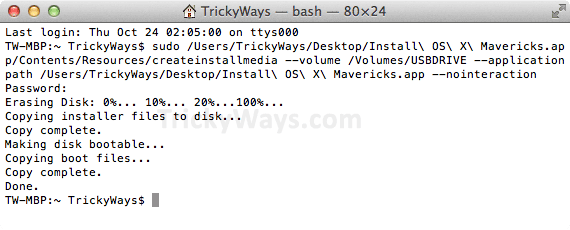
If command executed successfully you will see the progress as shown below. copying files will take some time about 15 mins, so don’t do anything until you get “Done.” message
Erasing Disk: 0%... 10%... 20%...100%...

Copying installer files to disk...

Copy complete.

Making disk bootable...

Copying boot files...

Copy complete.

Done.
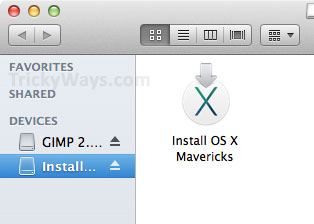
Explore the content of the USB drive, Now you have bootable OS X Mavericks USB drive that you can use on any Mac for fresh installation.
To boot your Mac from USB, plug in the bootable USB that you have created and restart your Mac, hold down the Option key while system is booting and you will see a window where you can select bootable USB drive to boot from.
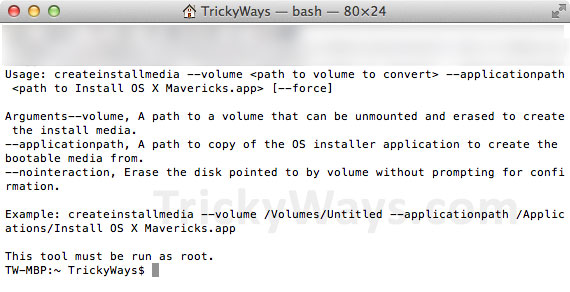
Command Explained
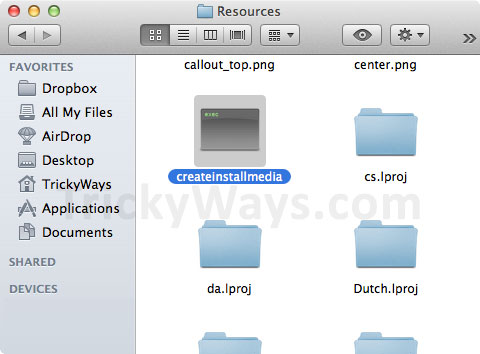
There is a createinstallmedia file in the OS X package that is used to create this bootable USB drive. To see this file ctrl+click on the “Install OS X Mavericks” file and select “Show Package Content option” then open Contents > Resources folder, here you can see this file is available.
So we use sudo command with combination of createinstallmedia file and pass some parameters and arguments, below screenshot which tells the command usage, optional arguments and example as well.