So you have just gotten your new iPhone 6 or iPhone 6 plus but you are worried about your data in your Old iPhone. Don’t worry we got you covered today! Thanks to iTunes and iCloud.
You can transfer your data using iTunes or iCloud choosing between them is just a personal preference. Make sure you have the latest version of iTunes installed on your computer to avoid any issues.
iTunes vs iCloud Backup
- iTunes Backup is usually faster than iCloud backup because it doesn’t depend on the internet to download your data.
- iCloud Backup requires Wi-Fi connection or it can work on Cellular connection without restoring photos and videos until connected to Wi-Fi.
Transfer iPhone Data Using iTunes
Step-1 : Backup Old iPhone using iTunes
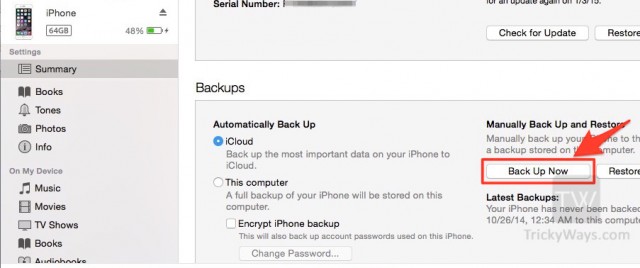
Connect your old iPhone to your computer using USB and lunch iTunes.
iTunes will show that your device is connected and show some other information just press back up now.
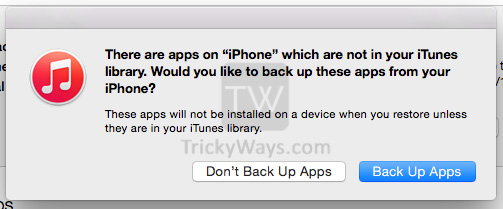
iTunes will ask you to choose whether you would like to transfer your apps or not if you wish so just press back up apps, and the backup process will start now.
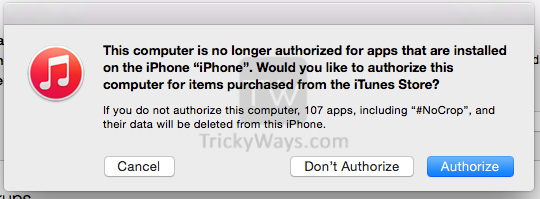
During the back up process iTunes will ask you to Authorize your computer to transfer your purchased items (aka downloaded items from iTunes store) just click on authorize and enter your Apple ID information then click on Authorize.
Wait until the transfer process is completed and disconnect your old device.
Step-2 : Restore backup to new iPhone using iTunes
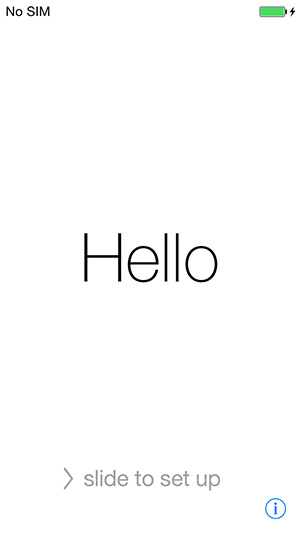
Now switch on your new device and slide to unlock the screen then choose your language and country and connect it to your Wi-Fi network.
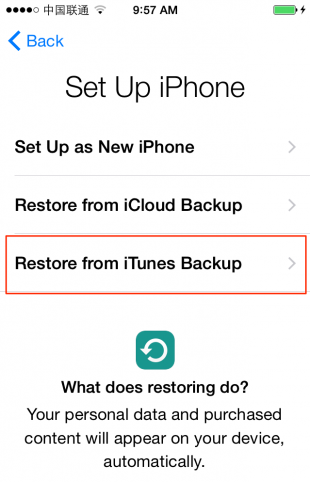
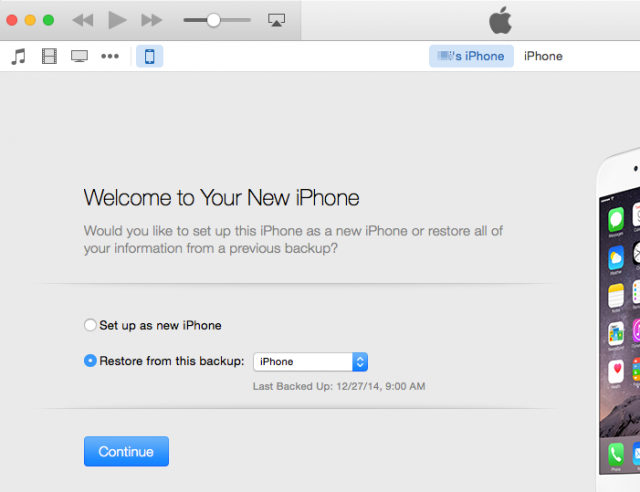
When prompted to set up your device, select Restore from iTunes Backup.
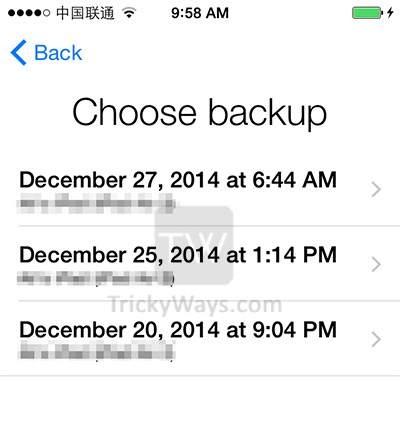
Connect your new Device to computer, iTunes will ask you to set up your device as a new device or restore from back up obviously choose restore from back up and then select the most recent back up available for your old device.
Restoring message will appear on your new device you will have to wait until the restore process is done.

When the restore finishes your device will restart. Keep it connected to your computer to transfer the data that isn’t included in the back up such as purchased apps which we authorized the computer to transfer in the step-1.
Wait until syncing message is gone and start enjoying your lovely new iPhone.
Transfer iPhone Data Using iCloud
Notice: iCloud Back up doesn’t include some data such as purchased apps and synced videos and audio files through iTunes (Captured videos and photos are included). You will have to re-download your apps from the app store again. iCloud Backup process requires Wi-Fi Connection so make sure you are connect to a Wi-Fi network then follow the steps.
Step-1 : Backup iPhone Using iCloud
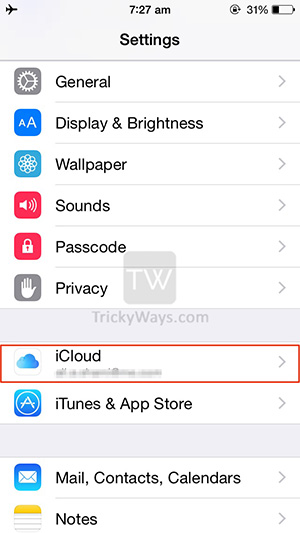
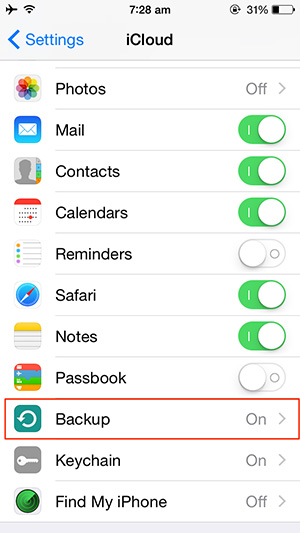
If your device is running iOS 8, to backup your device to iCloud, go to Settings > iCloud > Backup and choose back up now.
If your device is running iOS 7 or lower, steps will be a little bit different. Go to Settings > iCloud > Storage & Backup and choose back up now or you can check this guide.
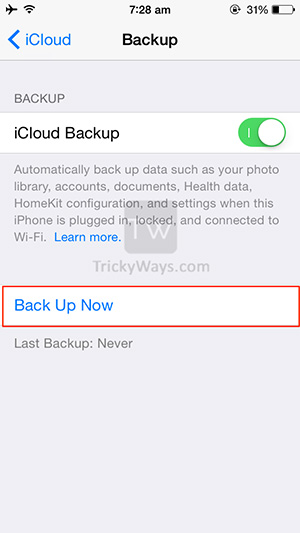
The back up process will take some time depending on your data size and how fast is your internet connection.
Step-2 : Restore iCloud Backup to New iPhone
When the back up process is done, switch on your new device and slide to unlock the screen, then choose your language and country and connect it to your Wi-Fi network.
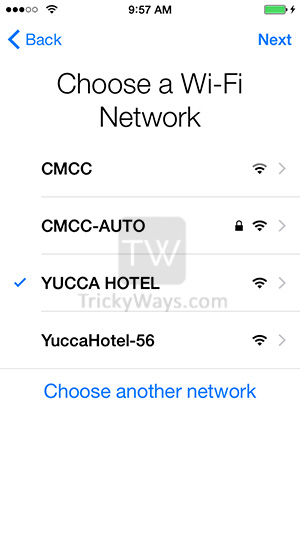
When prompted to set up your device, select Restore from iCloud Backup and enter your Apple ID and password.

Choose the most recent available back up for your old device and tap restore.
The restore process will take some time depending on your data size and the speed of your internet connection.