Normally to modify Windows settings for any program or hardware components we need to go through a few steps to access specific settings. There might be few settings that you frequently change like Location Privacy, Webcam Privacy or Display Settings, and going through these steps to modify it. To make this simple we can create a shortcut to any Windows settings and add this shortcut to the desktop or to Context menu (right-click menu) or even assign hot key to open specific settings from anywhere.
How to Create Shortcut to Any Settings
What if we create a shortcut of which app can access my webcam? Because I have to change it frequently according to my need. This makes easy for me; I can access this setting with a simple shortcut or from right-click menu whenever I want.
Windows URIs
We can use windows URIs (Uniform Resource Identifier) to create the shortcut or context menu of almost any Windows settings. Check here all the settings list of URIs by MSDN (Microsoft Developer Network). You can check some settings that are useful, we have collected for you below. Some setting only works or have some minor changes according to your Windows version like Windows 8.1 and 10. Some of these works only on mobile, some works on Windows or on both Windows and mobile.
- ms-settings:display
- ms-settings:batterysaver
- ms-settings-bluetooth:
- ms-settings:network-wifi
- ms-settings:network-proxy
- ms-settings:lockscreen
- ms-settings:privacy-webcam
- ms-settings:privacy-location
Create Shortcuts
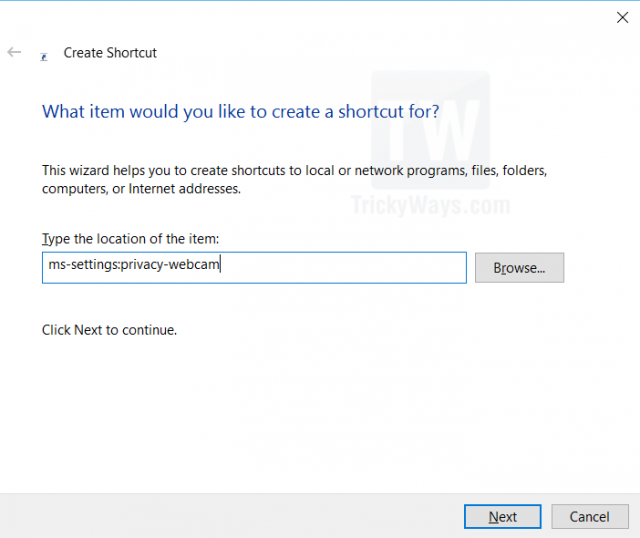
- To create a shortcut of any setting, create a shortcut by right-clicking where you want to create the shortcut and then choose New > Shortcut. A new shortcut wizard will open, here type or copy windows setting from above in location field. In my case I am creating shortcut to Webcam Privacy settings so type ms-settings:privacy-webcam and click Next.
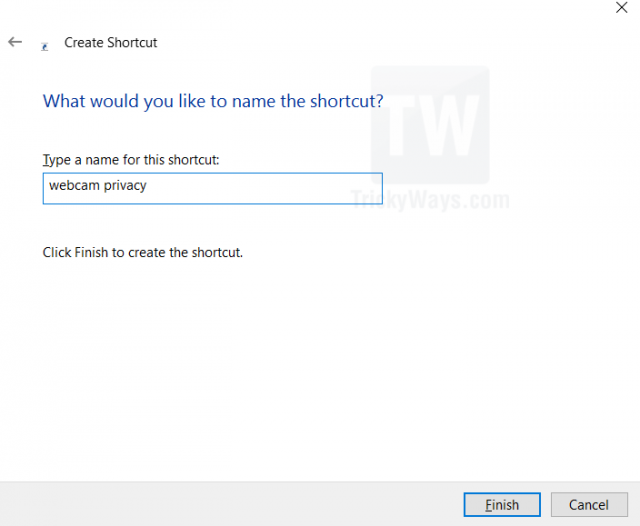
- Now type the shortcut Name and click Finish button. Your shortcut to Webcam Privacy Settings is ready. Just double-click on it whenever you want to open it.
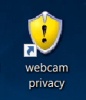
- To make shortcut more beautiful, set an icon.
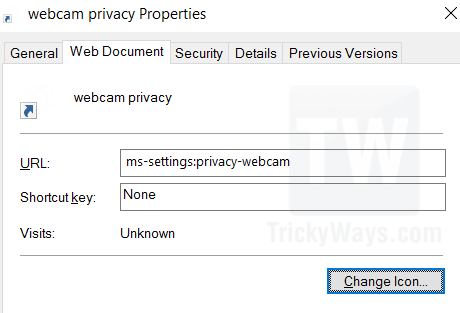
To do this simply right-click on it select Properties from the menu. On the Properties window click Web Document tab and then click Change Icon button and finally select icon and click OK.
Adding Settings to Context Menu
We can make this trick little easier by adding this shortcut into the context menu, so we can access it by simply right-clicking on the desktop and our favorite shortcut of settings will be there.
- Open registry editor by clicking on start menu and then type “regedit” and press enter. (Shortcut: Press windows key + R to open Run then type regedit and hit enter).Note: Be sure to stick with the instructions line to line. If you have done anything wrong then your system may not work properly.
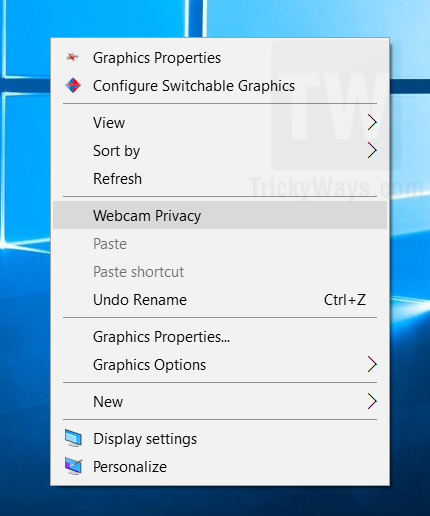
- In registry editor navigate to this path “HKEY_CLASSES_ROOT\Directory\Background\shell” and right-click on Shell folder then select New > Key option from menu to create a New key with your own name that will be displayed in the context menu. In my case, I am using Webcam Privacy.
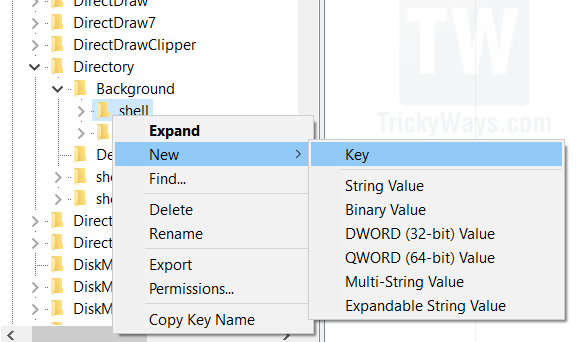
- Now add another inside (Webcam Privacy) that we created in last step. Right-click on Webcam Privacy or the key you created. Select New > Key and name it to “command”.
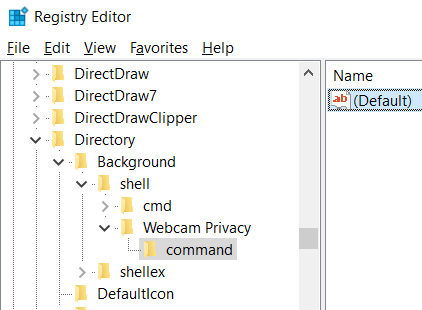
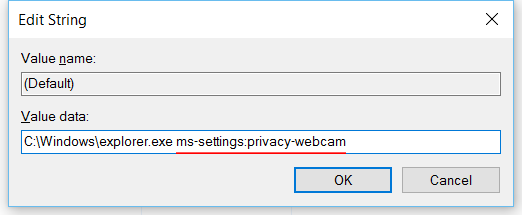
- Now select command key from left-side and you will see a Default value on right panel, double-click on it to open its properties. Now add the URIs with this syntax. Before every URIs add this line “C:\Windows\explorer.exe” and click on.
- All done. Now right click on anywhere and the magic will appear. Select the Main Settings to quickly access the settings.