Virtual Memory helps your computer to run smoothly saves sudden crashes and blue screen errors. Windows uses virtual memory when your computer is out of physical RAM (random access memory). Windows creates and store virtual memory on the hard disk of your computer in shape of files called page files (pagefile.sys).
It’s really important to set a reasonable amount of virtual memory on your Windows, so your computer will be able to use it when memory is too low. Otherwise, you might get windows message “Your computer is low on memory. Close programs to prevent information loss”
Virtual Memory settings
Open up the Windows virtual memory settings you need to follow these steps. This method will work on all desktop and laptop PCs running Windows 10, Windows 8 and 7 as well.
- Press Windows+R from the keyboard to open up the Run window.
- Type Control Panel in the Run box and hit Enter.

- This will open up the Windows Control Panel. On that window type System in the Search box. In the search results, click “View advanced system settings.”

- This will open up the System Properties window. On that window click the Settings button under the Performance section. On the Performance Options, windows select the Advanced tab. Click Change button under the Virtual memory section.


Change Windows Virtual Memory
Next step is to change the windows virtual memory. On the Virtual memory window, you can manage virtual memory size (pagefile.sys which is a file stored on the computer for virtual memory).
Automatically manage virtual memory
To make it easy Microsoft set the default option selected “Automatically manage paging file size for all drives.” This option is ideal when don’t know what to do or don’t have enough free hard drive storage space. When you select this option you will notice Windows disable all the options and will set automatically Total paging file size for all drive showing below.
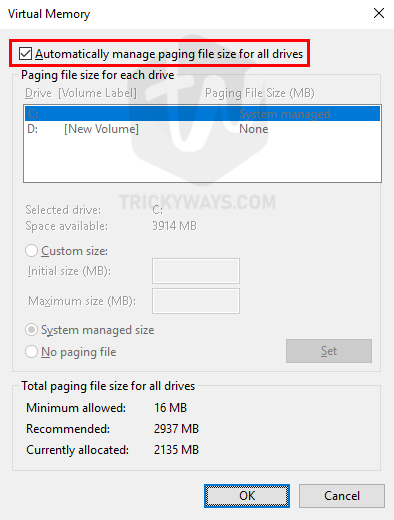
Set virtual memory size
You can increase virtual memory size and set the initial and maximum sizes on all the drives separately. In case you don’t want to create a pagefile on every drive ( because this will take some space on each drive) then you can select each drive manually and set options.
- To do that turn off “Automatically manage paging file size…” option from the top.
- Select a drive from the list and then select the option either Custom size, System managed size or No paging file.
- Finally, click the Set button to apply the changes (System might ask you to restart the computer).
In my PC I have total 16GB of physical memory installed on my computer but the SSD drive is just 500GB. As you can see in the screenshot below, I choose System managed size for C: drive and No paging for the D: drive. This way I saved the space on D: drive but to run multiple apps smoothly I set a paging file on C: drive to System managed size.

At the bottom of virtual memory windows, you will notice the Total paging file size for all drive showing recommended virtual memory for windows. You should consider these memory sizes while setting custom sizes.
Tip: Windows might also use pagefile to store the windows crash and error reports. If the paging file size is less than 800mb or you select the “No paging file” option then windows might not record the details that could help to identify the problem.
Once you set all the option then you might need to reboot your computer to apply the new Virtual memory settings.