Windows 10 new update which is released recently with tons of new features, changes, fixes, and improvements. Storage sense is one new Windows 10 features which help Windows users to free disk space automatically when they are running low storage. This feature is available in Windows 10 May update 2019.

Whenever you delete any kind file from your Windows, it will be moved to Recycle Bin. It won’t remove permanently because you might be deleted accidentally or other users might delete your files, that’s the reasons files move to recycle bin. In Recycle bin these take space from your hard drive of course and with time to time, you will get low disk space.
Learn More: How to free up space on a drive?
Storage sense feature automatically deletes files which are more than 30 days old in Recycle bin and also before 30 days if you are running out disk space, this will not only delete files from Recycle bin, it will also remove temporary files, you can also manually empty recycle bin. This new Windows 10 feature is very useful for those who have small hard drives or running low disk space.
Stop Automatically Emptying Recycle Bin
Deleted files can be recovered from the Recycle Bin unless you permanently deleted them with the help of Shift key. In any case, If you don’t want to delete your files in Recycle Bin that you may want to recover later, then you can stop this auto-delete feature. Let’s have a look to stop Windows 10 storage sense to empty recycle bin automatically.
- To turn this feature off, Press Windows+I keyboard shortcut or you need to navigate to Settings from “Notification Icon” and then click on “All Settings”. In Settings window click on the first option named “System”. Here select the “Storage option” from the left menu list in the system window.

- Now simply turn off the Storage Sense toggle button to turn this feature off. By doing this, your Windows will no longer delete your files which are 30 days old such as temporary files and the content recycle bin.

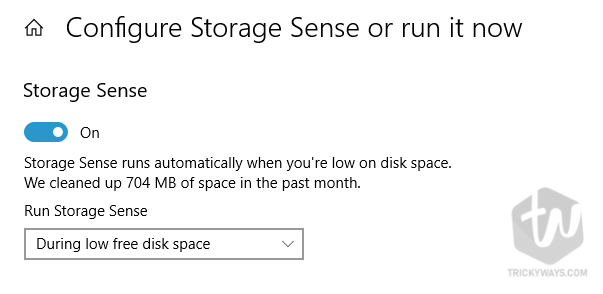
- To configure Windows 10 storage sense further in details click on Configure storage sense or run it now, with under the toggle button.

- The first option is the main option which controls the Storage Sense feature, this option starts the clean up automatically. By default Run storage sense set to start during low free disk space but there are other options too such as every day, every week or every month. Set one of these available options as you need.

- The temporary files section keeps the recycle bin deletion option. It’s also set to 30 days by default and also has more option like 1 day, 14 days, 30 days or 60 days. You can also turn it off by simply un-checking the Delete temporary files that my apps aren’t using option.


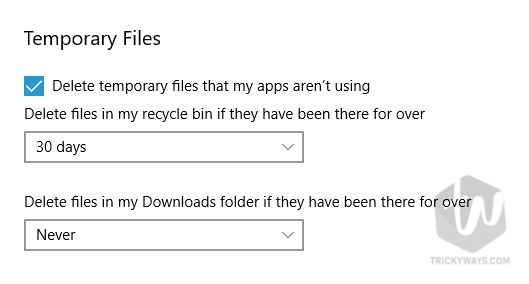
Windows 10 Storage Sense feature is a great addition and you can modify its settings according to your requirements. I would prefer to auto-delete temporary files after a specific number of days but deleting my Downloads files isn’t a good idea. This last option on that Windows is very handy to delete the old version of Windows that saved for the purpose if you decided to downgrade the Windows version. Anyhow, old Windows version backup automatically deleted after 10 days.
Did you find Storage Sense useful for you? share your experience below in comments.