Here is a quick method to lock apps on your iPhone running iOS 13 without Jailbreak. This method is 100% working and tested on iPhone and iPadOS 13 running on your iPad.
Another day, another amazing tutorial for all the iOS 13 and iPadOS 13 users. Apple users always wanted to lock an application on their iPhone. Still, Apple hasn’t added any genuine way to do this but added a very smart feature to lock applications on the iPhone or iPad. Today, I am going to show, how you can lock applications without Jailbreak. Also, we are not going to download any third application.
With iOS 12, Apple added Screen Time feature to protect and lock applications. This is much helpful when you want your device away from kids. For example, if your child is addicted to YouTube and always looking for a video then you can set a passcode timer on application. However, this feature is available on a parent and child device. With the help of iCloud, you can manage applications and set the timer on all devices.
So, if you are one who wants to lock apps on your iPhone especially Photos App then this tutorial is for you. But, before proceeding next keep in mind, applications locked with the timer will stop sending notifications once locked. Do this, if you are okay with this.
How to Lock Applications with Screen Time Feature
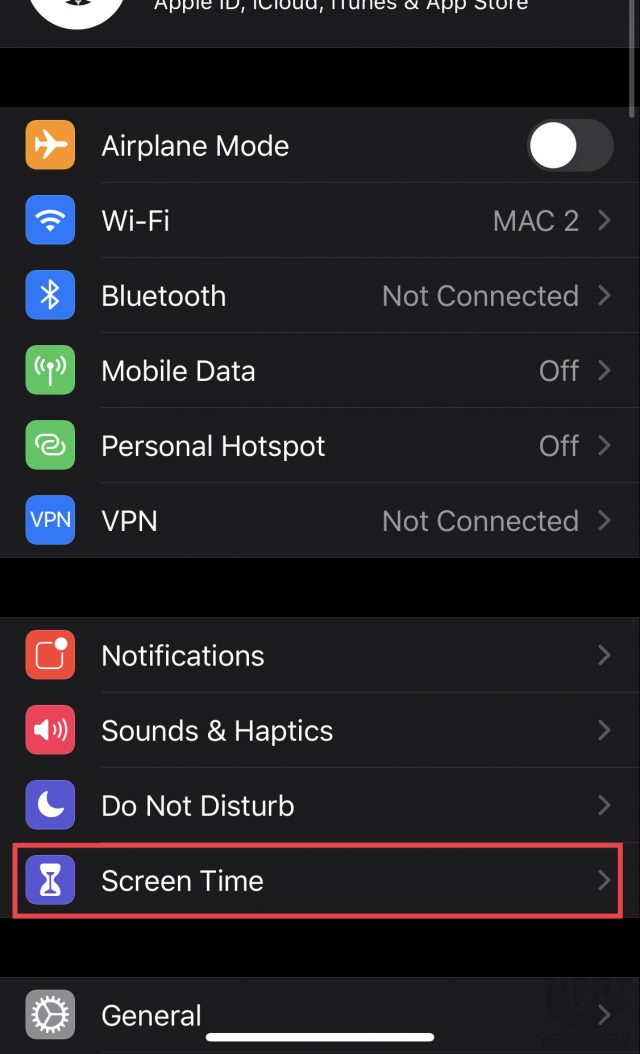
- At the very first, Go to Settings > Screen Time on your iPhone or iPad. You need to turn it on when you are using it first time.


- Hit Use Screen Time Passcode and Choose a 4 Digit Passcode to set on your apps.

- Choose applications at once by selecting the first option or select apps manually. Set minimum time to 0 hours and 1 min for a kind of more security.
- You have added a passcode timer to your favorite applications. Just keep in mind, there is no way to lock applications intermediately.
- Finally, Open Locked application and hit Ask for More Time bottom of the screen.


You can’t change the time limit message on the screen, but you can still protect applications from friends and family members. After entering the passcode, either choose Enter Screen Time Passcode or ask for One more Minute (timer you set for the day). Finally, enter the passcode and access application.


You can ignore some applications if you want them to use anywhere, anytime just go to Settings > Screen Time > Always allowed screen and they will not be included in this feature.
Also, you can apply the settings at once across all of your iPhone and iPad if you are using the same iCloud ID on all devices. Moreover, if you have different devices and want different settings then you will find your devices under Settings > Screen Time > Top Right Corner. That’s it.
I hope you have learned something new today. If you have any questions in your mind please ask them in the comment box below. Also, if you have liked this tutorial share your valuable comments.
For more exciting iOS tutorials, keep visiting us. Subscribe to our News Letter for push notifications on your device. That’s all for today. Signing out, Peace.