Creating a bootable USB drive of OS X Yosemite 10.10 if you want to save it on a external drive for future usage or just want to install it on multiple Mac computers. To make OS X Yosemite bootable USB installer drive, there are few requirements. Lets see what are those.
Note: This guide to make installer USB drive is for OS X Yosemite Developer Preview
See also: Dual Boot OS X Yosemite and Mavericks
Make OS X Yosemite Bootable USB
Requirements
- You must have an external USB drive or storage media with capacity of at-least 8GB (Save data from it because we are going to format it).
- OS X Yosemite installer downloaded (You can join OS X Beta program)
Prepare USB drive for OS X Yosemite
Open Disk Utility from “Applications” > “Utilities” or press “cmd+space” keys form keyboard to find “Disk Utility”.
Plug the external USB drive into Mac (make sure you save your stuff from it). Once you attached the USB drive, it will shown on the left panel of Disk Utility.
Select the drive and then do the following steps to create a single partition that is required to make USB installer drive for OS X Yosemite 10.10.
Click on “Partition Layout” drop-down menu and select “1 Partition” option from it.
Then enter the Partition information Name: ”osxyosemite”, Format: “Mac OS Extended (Journaled)”.
Click the “Options” button to select the partition scheme, so select “GUID Partition Table” option and click OK button.

To complete the creating partition process hit the “Apply” button and then “Partition” button. This will take some time to format and making USB drive as a 1 partition. Once done, you will notice a new drive name will be displayed on the left side, the name that you given in the partition information. Now close the Disk Utility tool.

Show hidden files
Showing hidden files is required, because there are few hidden files in the OS X Yosemite installer package that you need to unhide first to write them on bootable USB drive.
Open Mac “Terminal” command line: press cmd+space keys and type Terminal in the spotlight, click the Terminal from search results or just open the Terminal from Applications > Utilities > Terminal.
Type the following two commands one by one:
defaults write com.apple.finder AppleShowAllFiles YES
Killall Finder

First command is going to show hidden files and the second one is to restart the Finder so we can see the instant effect of first command. Close the Terminal.
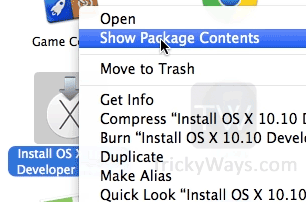
Open Applications, here you will see your downloaded OS X Yosemite file “Install OS X 10.10”. Cmd+click on it to view the menu, select “Show Package Contents”.
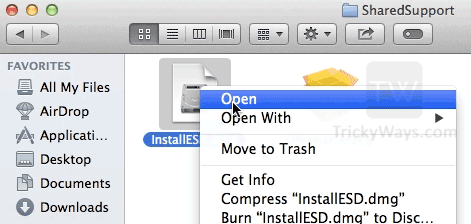
Open “Contents” > “SharedSupport” folder and here you will see “InstallESD.dmg” file, double click to open the file and OS X may starts verifying this file so let the verification process finished.
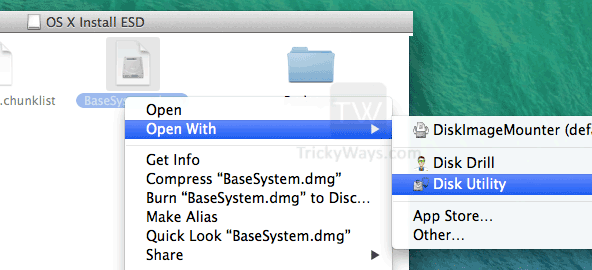
After that you will see a folder with the following content in it, “BaseSystem.dmg” is the file that we need and it was hidden, so now you know that why we show the hidden files in above steps.

Open the Disk Utility again from “Applications” > “Utilities” > “Disk Utility” or by using Spotlight search.
Load the “BaseSystem.dmg” file into the Disk Utility, right-click on the file and choose “Open With” > “Disk Utility” option. After doing that open the Disk Utility and you will see the file “BaseSystem.dmg” is loaded in the Disk Utility on the left side.
Restore Disk Image
Now we are going to restore “BaseSystem.dmg” disk image on the USB drive.
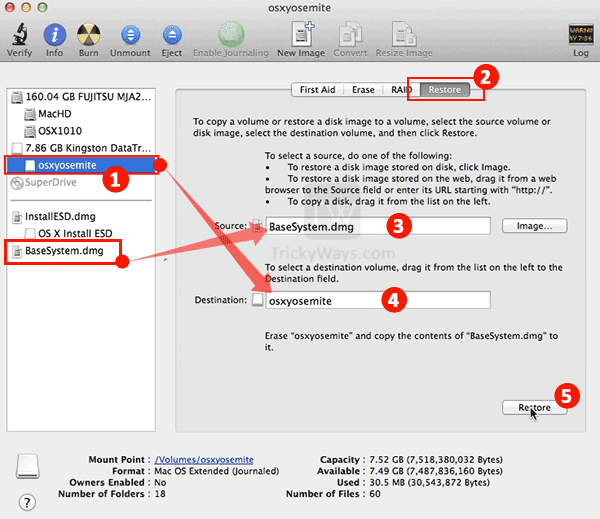
Select your USB partition that we created in previous first steps, then click the Restore tab.
Under Restore tab there are two fields, Source and Destination.
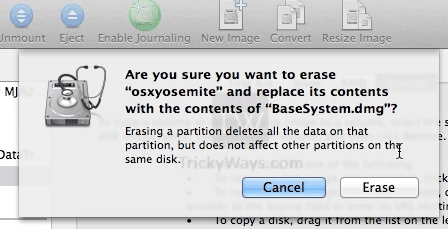
Click and drag the “BaseSystem.dmg” to Source field and “osxyosemite” usb drive to Destination filed, see screenshot below to get more idea. When done hit the Restore button and you need to confirm “Are you sure you want to replace the content on USB drive with the content of disk image” so click the Erase button to confirm, after that you may need to enter the administrator password. Restoring disk image is time taking process so be patient.
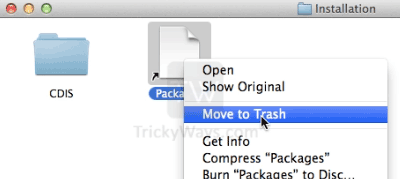
Once the restoring disk image process is finished you will see a folder like this. Here, open the “System” > “Installation” folders and move the Packages file to trash.

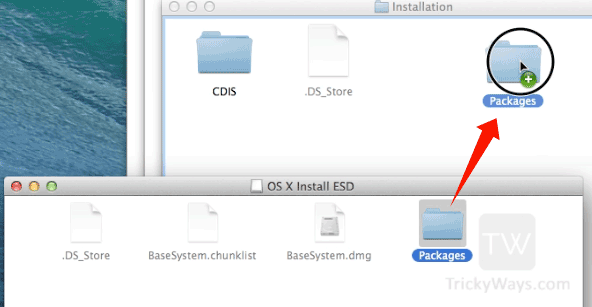
Copy the “Packages” folder from the folder where the “BaseSystem.dmg” exist. and paste it into the Installation folder that you just opened in previous step.
Hide the system files again using this command
defaults write com.apple.finder AppleShowAllFiles NO
How to Boot from USB Drive
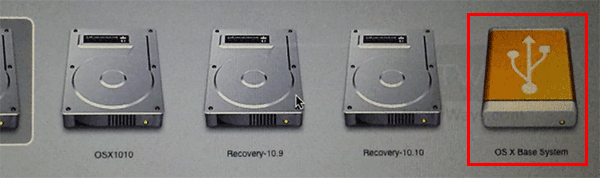
You must know the system requirements of OS X Yosemite before installing it, If your system to capable to run this OS X version 10.10 then Shutdown your Mac, plug the OS X Yosemite Bootable USB into Mac. Press the power button again to turn it On and then hold the Alt or Option key from keyboard, when you see this screen release the button. Double click on the USB drive to boot from it.
Congratulations! you successfully perform all steps to make bootable USB drive to install OS X Yosemite on more that one Mac computers without worried of downloading it on each computer separately, you will saved lot of bandwidth and time as well. Thanks for reading if you have any problem we are here to help you just write your problem below in comments box.
would you please help me
i just formatted my macbook pro by a mistake
i have OSX 10.10 as a DMG file in my pc
so i want to make a bootable usb with OSX 10.10 BUT using windows computer
thanks in advanced
Hi there,
this won’t (afaik) work. Maybe you install your old OS, like 10.9 or 10.8, on your mac, download the 10.10 app from the Mac App Store and then just go on with this tutorial.
Hope this helps you a little. Good luck!
Hi,
I upgraded to Yosemite from Lion. For the sake of a ‘clean install’, I am trying to make a Yosemite Bootable USB. I got an error – could not find mac OS X base system.
I tried following your steps in creating a bootable usb, but can’t open InstallESD.dmg.
Please help!
My MacBook Pro is super slow now after installing Yosemite. The only option i am left with is to do a clean install perhaps!
Thanks.
Hi,
When i am restoring the Disk image, BaseSystem.dmg to the USB drive partition I created, it says, Restore Failed. Could not restore-Device not configured.
Please Help!