Do you want to enable dictation on Mountain Lion 10.8+ which is a built-in feature out of 200+ exciting new features of this version of Mac OS? Then guide below will let you people learn the process to enable dictation which is by default disabled on Mac OS X Mountain Lion, so continue reading after the break.
![]()
Enable and Use Dictation on Mac OS X Mountain Lion
Step-1
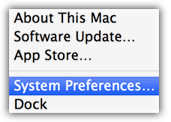
Click Apple menu > “System Preferences”
Step-2
Under “System” section click on “Dictation&Speech”

Step-3
Click on “Dictation” tab

Step-4
Click on “ON” radio button followed by Dictation
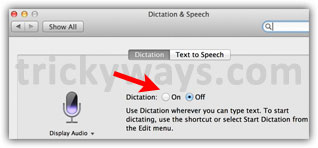
A dialog box will open where you have to click “Enable Dictation” button to proceed

Step-5
Click on drop down menu beneath microphone icon to select an audio input, as we have selected “Internal microphone” of MacBook
You can also select a Shortcut from the drop down list to start a dictation and use drop down followed by “Language” to select your preferred language for dictation on the same screen

Dictation is enabled now, which you can activate in any text field or text application with its shortcut key or navigating through “Edit” > “Start Dictation” from the opened text application menu, and it will appear as a microphone icon with a “Done” button on it.
Remember to click on “Done” button when you finish speaking, the limit is 30 seconds. Meanwhile animated dots will appear on dictation icon which is a symbol that your voice input is transcribed and it will appear as a text after processing.
Suppose your dictation text will appear like following image if you speak like this while you have activated Dictation.
This is trickyways period com period

Note: This is important to remember that Mountain Lion dictation feature does not have support to correct grammer or punctuation. So, if you want to place a period, comma, dash, exclamation point or other stuff like that in your text, then you have to speak it as well.
You can check out a detailed list of Dictation commands for Mountain Lion at Apple’s Official page.