Normally when you turn on your Windows 10 computer or laptop, Windows 10 automatically connects to the Wi-Fi networks which you used already eight after the Windows desktop appears but at times, your Windows might not connect automatically connect to the Wi-Fi network.

I was also stuck in this problem after upgrading Windows 10 to 1903 and done many things and tries everything but finally found a solution.
If you are also one of those who’s Windows 10 is not connecting to the default Wi-Fi connect automatically, then you try the below methods to fix the issue.
Fix Wi-Fi Doesn’t connect automatically Windows 10
Before doing anything first you need to restart your computer and check for the issue. If nothing happens then try to forget the Wi-Fi connection and then again connect using the password. Click the Wi-Fi icon in the status bar to view the list of available connections. Right-click on the connection and then select Forget from the menu. Again failed? then try below methods.

Method 1:
Disable Microsoft Wi-Fi Direct Virtual Adapter
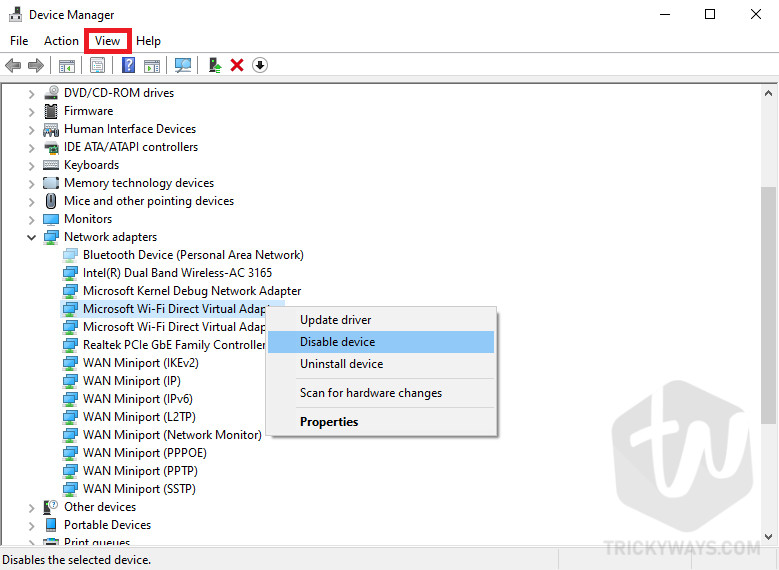
Open device manager by right-clicking on start menu icon then select Device Manager.
In Network adapters, find Microsoft Wi-Fi Direct Virtual Adapter and right on it then select Disable device. If you did not find this option in Network adapters, then click on View and select Show hidden devices then Microsoft Wi-Fi Direct Virtual Adapter will be shown.
Method 2:
Reinstall Wi-Fi drivers
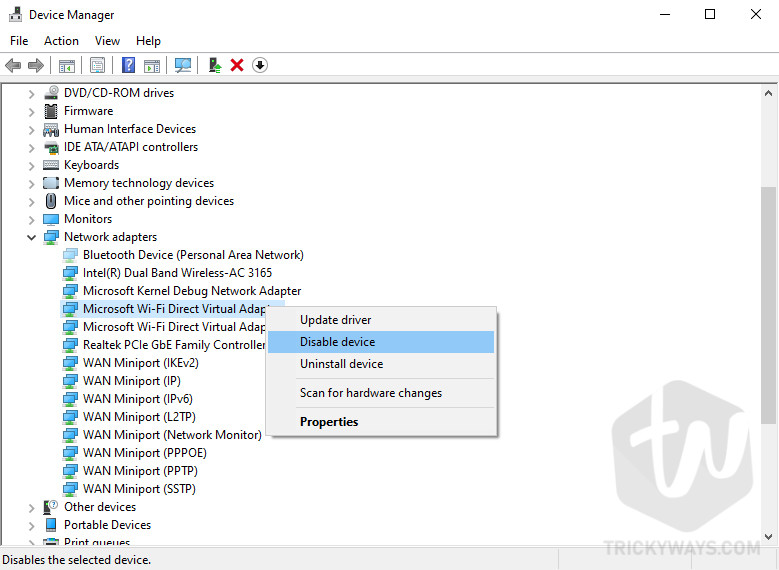
The outdated or incompatible driver also cause these kinds of issues. Update your Wi-Fi adapter driver might help you. To do this, open Device Manager, then expand the Network adapters. Now right-click on your Wi-Fi adapter and select Update Driver.
Method 3:
Uncheck Turn off this device to save power
There is a built-in option in Windows which can turn off your Wif-Fi adapter to save the power when Windows in idle state. This may also prevent Windows to connect automatically to the Wi-Fi network.
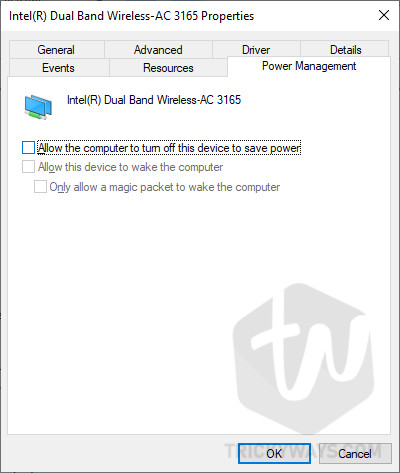
To turn this feature off, open Device Manager and expand Network adapters. Open properties of you Wif-Fi adapter by right-clicking on it. In Power Management tab uncheck the option Allow the computer to turn off this device to save power.
Method 4:
Run Network Troubleshooter
If you are using the latest version of Windows then you will find this feature in Update & Security, then Troubleshoot tab. Now click on Internet Connections.
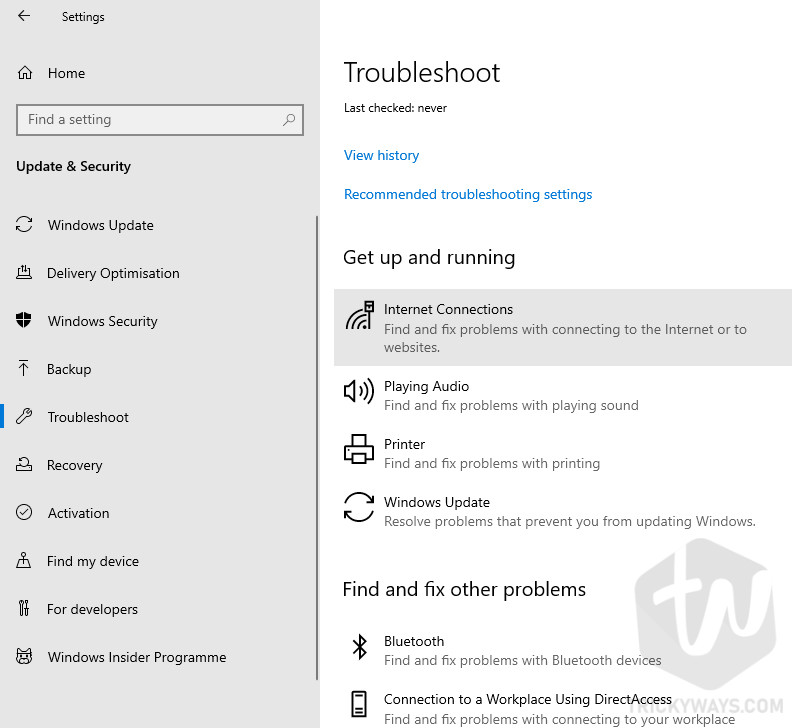
Now click on the Run Troubleshooter. It will scan all the changes and issue in your Windows related tot he Network only. Then try to fix the problems if found any.

Method 5:
Network Reset
If none of the above works for you then you have to try to reset Windows 10 network. To do this simply press Windows key and the type Network Reset. Now click on Network reset settings.
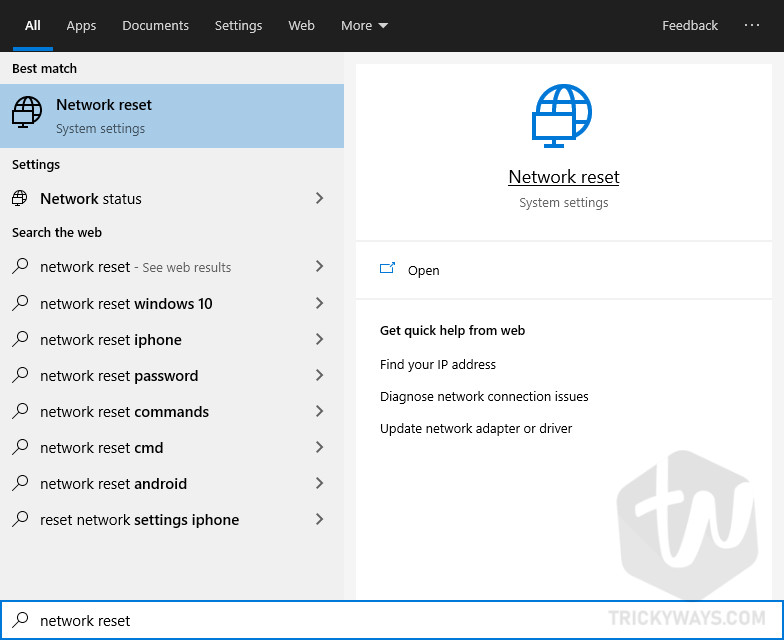
This will remove and then reinstall all your network adapters, and set other networking components back to their original settings, you might need to reinstall other networking software afterward, such VPN client software or virtual switches. Now click on Reset Now button and your computer will restart, then follow the instructions.

Still having trouble auto-connecting to wireless network then please leave a comment below. Also mention your computer, Windows version installed on it. We will happy to answer your question to solve the problem.