If you want to change search engine on your computer then guide below will help you to do that easily. Users of Google Chrome or Mozilla Firefox browsers can follow guide below to change default search engine through their web browser’s settings.
Change Default Search Engine in Chrome
Step-1
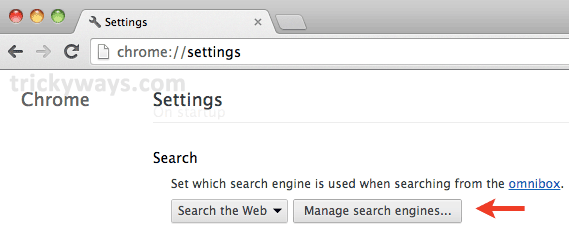
Open Google Chrome and click on “Chrome” menu, and click on “Preferences”, which will open the “Chrome Settings” page

Step-2
Scroll down to “Search” section and there click on “Manage search engines…” button

Step-3
List of Search engines will get open, so select any of your choice, and click there on button “Make default”, to set it default search engine in Chrome and click on Done button at the bottom of window and thats it. Here you can also observe that ‘x’ button appears at the cornor of your selected browser which you use to remove search engine from the list of Default search settings in Google Chrome

Change Default Search Engine in Firefox
Step-1
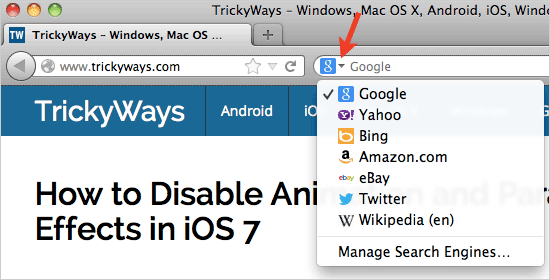
Simply open Firefox on your computer, and click the arrow on search engine bar, a list of search engines will get open, there just click on your required search engine to make it default search engine in Firefox web browser and thats it.
At the end of opened menu to set default search engine, you find an option to “Manage Search Engines…”, which you can use as well to make further changes in default search engines in Firefox

See also:
How to Change Default Search Engine of Safari on iPad