This quick tutorial will show how you can share files between Ubuntu and Windows 8. For the purpose of sharing different resources, Files and Printers on home or small networks, we use workgroup method. When we create network with workgroup method on Windows based PCs then its easy and we don’t need any extra thing. But when It comes to file sharing between Windows 8 and Ubuntu then we have to install Samba pack on Ubuntu Linux to join the workgroup. Microsoft design workgroup to create network between small group of computers, If you have more than 15 computers its difficult for you to mange it and you have to choose client server method like domains.
See also: File Sharing OS X Mavericks and Windows 8
Both Ubuntu and Windows computers must be on same network or using same internet connection via Wireless (WiFi) or Ethernet to successfully share files between Windows 8 and Ubuntu.
Share Files Windows 8 and Ubuntu
Steps on Ubuntu
To create Ubuntu computer a member of Windows workgroup we have to install Samba on Ubuntu to support workgroup features.
Installing Samba on Ubuntu
Logon to the Ubuntu machine and install the Samba Packages. Samba is used by Ubuntu for file sharing purpose with Windows computer.
We are going to install Samba on Ubuntu using Terminal, press “Ctrl-Alt-T” from keyboard to open up the Linux Terminal. From here execute the following command:
sudo apt-get install system-config-samba

If you find that kind of error then you have to execute the following commands fix broken packages, to clean cache, to fetch new samba with dependencies.
sudo apt-get install -f
sudo apt-get clean
sudo aptitude install samba
sudo apt-get install glade
sudo apt-get install python-glade2
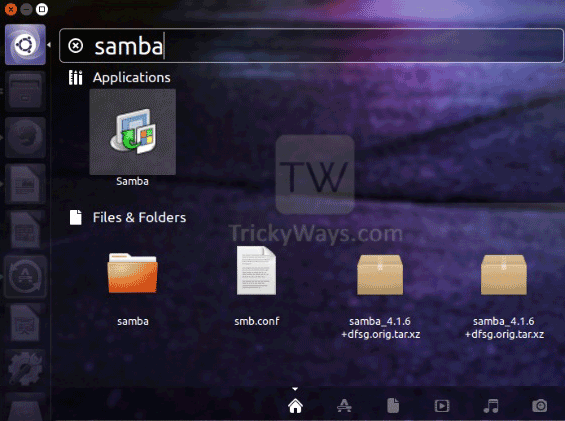
Once both of these packages are installed go to the Dash Home, type samba in the search box and click the Samba application to launch it to set some options for file sharing with Windows 8.

Once it opens up, go to “Preferences” menu and then select “Server Settings”. Here type the Workgroup name your Windows is a member of, for example type workgroup in the “Workgroup text box” because the default “workgroup name” used in Windows is “workgroup”. Click OK button to save the settings.

If you got an error called Could not display “network:///”. Nautilus cannot handle “network” locations.
Then you have to execute this command in the Ubuntu Terminal.
sudo apt-get install gvfs-backends

Steps on Windows 8
Enable file and printer sharing on Windows
Before joining workgroup on computer, make sure the workgroup name on Windows computer is same that you given in Samba server settings on Ubuntu. See this guide if you want to change Workgroup name.
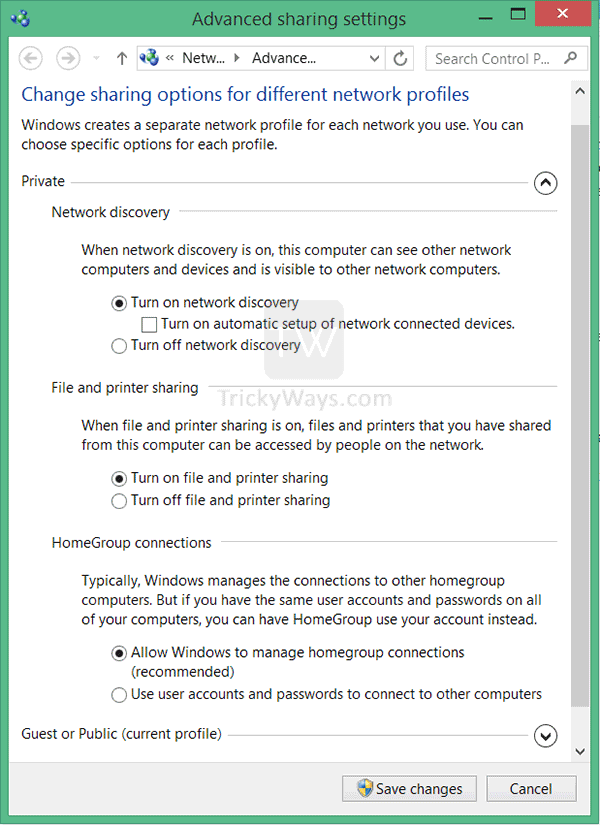
You also have to ensure that file sharing is enabled in Windows 8. If not, you won’t be able to access file from other systems so let’s get started. To enable file sharing in Windows, on Windows Desktop press “Windows+W” keys from the keyboard which will open up the Charms Settings Search bar.
When this opens up, search for “manage sharing” and then click on the resulted search.

After this, turn on the file and printing sharing in the private/public network profiles. You also have the option to turn on file sharing for all network profiles. Save when you are finished.

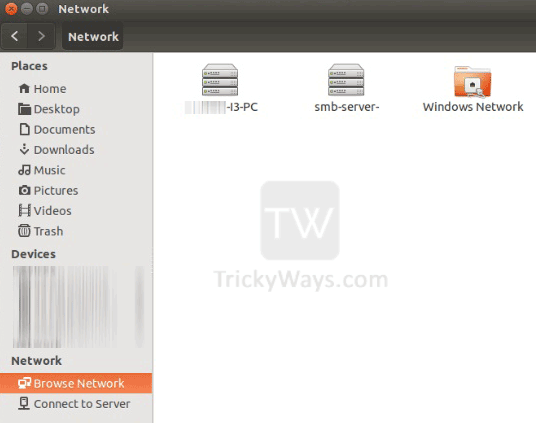
Since now both of the systems belong to the same Workgroup, reboot both computers. When you login, you will be able to see the other system from both of your machines.

That’s how to share files between Windows 8 and Ubuntu. If you have any question please reply below in comments.