After upgrading Windows to the latest version which is released recently Windows 10 May update 2019, many users face any kind of issues. Windows 10 Remote desktop app helps you to connect to another computer over an internet connection or local network. This Remote desktop app can be downloaded from Windows Store free of cost.

Many users are facing the black screen with remote desktop after upgrading their computers to Windows 10 May update 2019.
I upgraded my secondary machine from 1809 to 1903. When I access it now using Remote Desktop all I get is a black screen in the RDP windows. I then upgraded my primary machine to 1903 hoping that would help, but no. Fortunately I also have GoToAssist installed so I was able to log into the secondary machine that way and checked for updates, still no help. Finally I reverted it back to 1809 and Remote Desktop once again works. I could keep using GoToAssist but RDP over my local LAN is much faster. As long as this version as been (more or less) gold before going public, I can’t possibly be the first one with this issue. It’s no big deal to me that my secondary is running 1809, it’s primarily a file server, but upgrading would be nice. Granted, that secondary system is an older Core2 Quad, but at 3.3GHz and 8GB of memory and a SSD, it’s plenty fast enough. I suppose I could try a different video card, but it shouldn’t be necessary for a feature update. Anyone have some insight into why RDP isn’t working. I’ve already been through all the “guesses”. 🙂
Source: microsoft
Fix Black Screen with Remote Desktop Window 10
To fix this issue, you need to update, roll back your display drivers or also check for latest chipset, BIOS/UEFI firmware drivers too. If nothing works you may also try with adjusting your computers display resolutions. Let’s have a look at how to do these things to solve our Windows 10 problem.
Method 1:
Update Display drivers
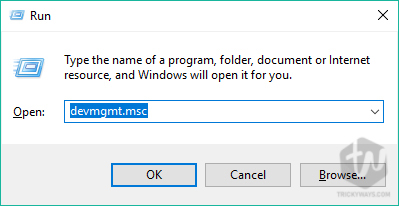
Press ctrl+r from your keyboard to open Run command. Now type “devmgmt.msc” and hit Enter to open device manager.

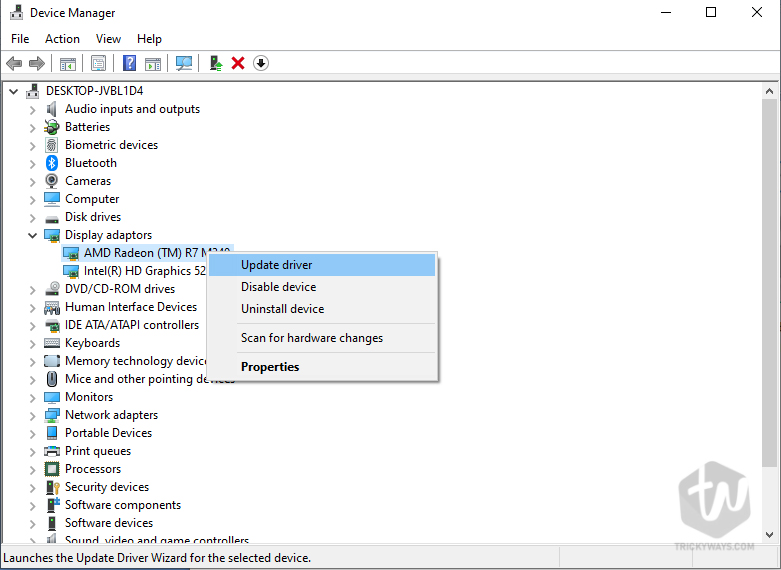
In the Device Manager, Find and expand Display adapters, then right-click on your display adopter and select Update driver. If you have more than 1 adopter, then follow this step for both.

Screenshot: Update driver
You can also download your display adapter’s drivers from the official site. Download Display Driver for Intel – AMD – Nvidia. Just go to the official site, search for your product name and download the drivers.
Method 2:
Rollback Display drivers
Press ctrl+r from your keyboard to open Run command. Now type “devmgmt.msc” and hit Enter to open device manager.
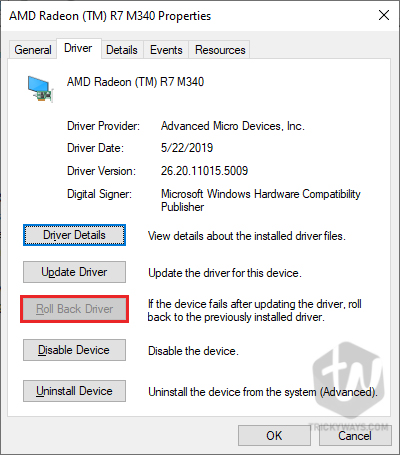
In the Device Manager, Find and expand Display adapters, then right-click on your display adopter and select Properties. In the Drivers, tab clicks on Roll Back Driver are available.

Method 3:
Try old Display drivers
Latest drivers might not be compatible with Windows 10 update; in this case, you need to try with old drivers. After doing this restart your computer and see the problem is solved or not.
Method 4:
Clean install Windows 10
Clean installation of Windows 10 is the best option when you are facing the performance issue on your computer or there are other reasons too like affected by malware, apps issue, low memory, etc. In this situation, a clean installation is the best option which removes each and everything from your system drive and helps to run the system fresh.