Secure Boot is one of the System requirements for Windows 11 installation. So, to check whether your PC has support for Secure Boot or not the simple and easiest way is here.
What is Secure Boot by the way?
The Secure Boot is a BIOS settings in modern laptops and desktop computers. Secure Boot option increases the PCs security and makes sure you are safe from Malware, in other words, Secure Boot makes sure your computer boots only from software that is trusted by OEM, in this case, its Microsoft Windows. You can enable or disable Secure Boot from the BIOS settings on your PC. Here you can read more about it.
See the Windows 11 System Requirements
Check if your PC supports Secure Boot
So, to find that whether your computer supports Secure Boot you can use a built-in Windows utility. Just follow the given steps below:
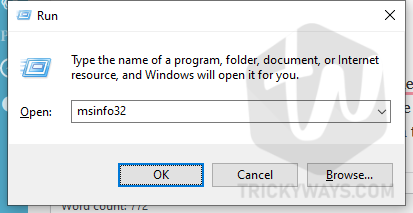
- Press Windows + R keyboard shortcut to open up the Run window.
- Type msinfo32 in the Run window and hit OK.

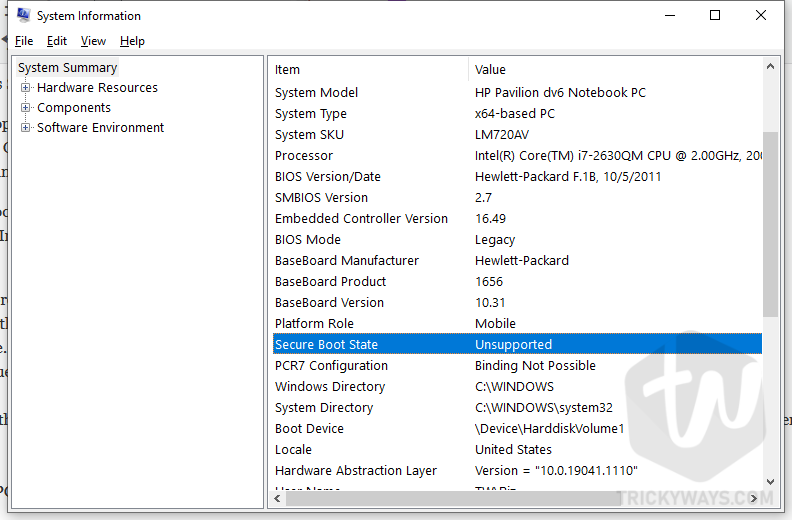
- This will open up a System Information window, make sure System Summary is selected. On your left side of the window, find the Item with the name Secure Boot State and check its Value. As you can see on my computer Secure Boot State is unsupported, which is self-explanatory.

On your computer, you might see one of the following values for the Secure Boot Stats.
Secure Boot: On
Your computer does support this feature and it’s enabled in the BIOS.
Secure Boot: Off
Your PC’s hardware supports Secure Boot, but it’s disabled from the BIOS settings.
Secure Boot: Unsupported
That means your laptop or desktop computer doesn’t support Secure Boot.
How to Disable Secure Boot
If your PC does support the Secure Boot and you might want to disable it then continue reading.
This only place form where you can disable the Secure Boot option in the system BIOS. So, to enter in the BIOS you need to restart your computer and then press and specific keyboard key when you are on the PC’s boot screen. This keyboard key is almost different for all computer manufacturers. Usually, you can see this instruction at the boot screen to enter into the BIOS. You can consult the manufacturer’s website to find the key or try one of the following most common keyboard keys to enter in the system BIOS: F1, F2, F11, F10, DEL
Once you entered into the BIOS settings, look for the Boot or Security related section and in that section find the Secure Boot option and make sure it’s Disabled or Off. Once you changed Secure Boot settings off, just press the F10 key to save the settings and exit from the BIOS. Now, after restarting and going into the Windows, make sure Secure Boot State is Off in the System Information as we checked above.
NOTE: After disabling the Secure Boot you might install software/hardware that was restricted to install when Secure Boot is enabled, In the future, you might need to restore your PC to the factory settings state to re-enable the Secure Boot.
If you have any questions please leave a comment below and we will happy to answer them.