Capture the Mac screen according to your requirements, like the entire screen, a specific window, or even and a portion of the screen or window. In this guide, you will learn all the methods to take screenshots on Mac.
You will see how you can take a screenshot using the following methods.
- Using keyboard shortcuts
- Use the Screenshot toolbar (macOS Mojave or later only)
Using the keyboard shortcut
Keyboard shortcuts that you can use to capture the complete screen, selected area of the screen, or any windows or menu.
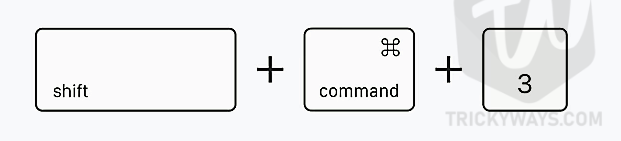
Screenshot entire screen
- You need to press the following keys from the keyboard to take a screenshot, press Shift + Command + 3
- After capturing the screenshot, you will see a thumbnail preview at the bottom-right corner of the screen. After that, it will be saved on your desktop by default.
Screenshot of a portion of the screen
- If you want to take a screenshot of a portion of your screen, press Shift + Command + 4 keys from the keyboard.

- Doing that will turn your pointer into a crosshair
 .
. - Just move it to the position where you want to start the screenshot, click and drag to select an area and then release your mouse or trackpad. In case you change your mind and want to select the area again just press the Esc key cancel before releasing your trackpad or mouse.
Screenshot of a specific window or menu
- Open the window or menu that you want to capture on your Mac
- Press Shift + Command + 4 + Spacebar, this will convert your mouse pointer to a camera icon
 . Here you can press the Esc key to cancel the capturing.

- Take that camera icon to a specific Window or Menu and it will be highlighted, just click it. If you don’t want to capture the shadow in the screenshot then press the Option key while you click.
- Click the thumbnail preview on the bottom-right corner to edit it or the Screenshot will be saved on your desktop.
Using Screenshot Toolbar
In addition to the above shortcut method, you can use the Screenshot Tollbar method to capture the screen and record videos. Screenshot Toolbar is a choice when you want to record your screen or change the screenshot options like the saved location. Again, the Screenshot Toolbar is only available in macOS Mojave or later versions.
- To open up the Screenshot toolbar, press Shift + Command + 5 and the set of tools will appear at the bottom of the screen by default.

- On the left side, three tools can be used to take screenshots (Capture the entire screen, Capture a window, Capture a portion of the screen.)

- In the middle, the two recording tools can be used to record the screens (Record the entire screen, Record a portion of the screen.)

By default, all the captured screenshots on the Mac saved on the desktop as a PNG file format with the name “Screen Shot [date]at[time]”. Click the Options button to see the different customization options. You can choose a different location to save the screenshots or set a timer to capture the screenshot.