Here is how to downgrade iOS 13 to iOS 12.4.1 Without Losing Data. A Quick way to downgrade iOS 13 using iTunes only.
Another day, another amazing tutorial for those who have installed iOS 13. I know you are here because you have installed iOS 13 final or public beta on your device. Your device may feel slower or may have facing unknown bugs. Or the biggest reason people don’t like is that if the battery timing issue.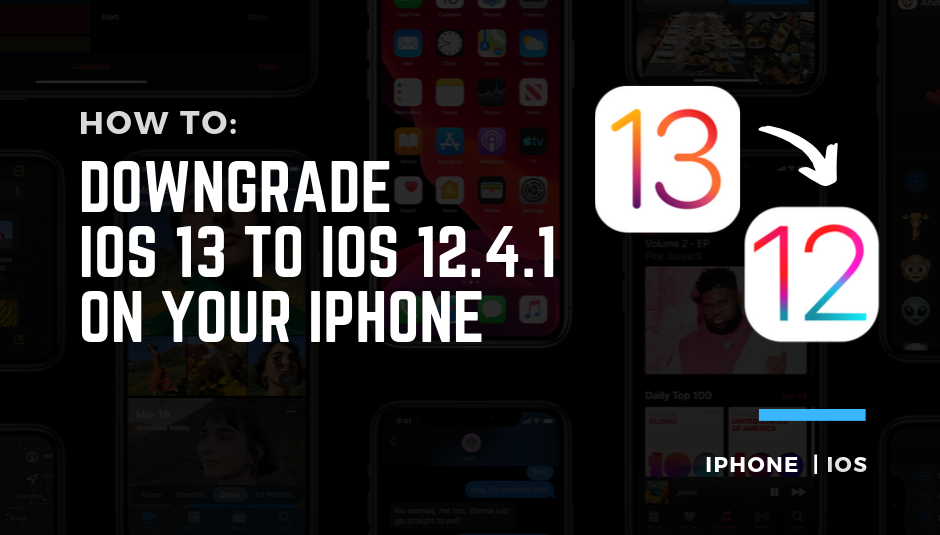
Alright! No issue which iOS 13 release you have already installed on your device. In this article, I am going to show you how you can downgrade iOS 13 to iOS 12.4.1 without losing data.
There are different ways available to downgrade your device. Mostly, people prefer third-party tools like 3utools. I am not that one who is asking you to download any paid or third-party tool.
Downgrade iOS 13 to iOS 12.4.1 Requirements
Before proceeding next, there are some requirements and some tips for you. You must read them all for a smooth downgrade.
- iTunes running on macOS or Windows
- Do a complete backup of your device
- Turn off iCloud > Find My iPhone
- 50% battery on your iPhone, iPad or iPod Touch
If you think you meet these requirements then you are ready to downgrade your iPhone, iPad or iPod Touch.
How to Downgrade iOS 13 to iOS 12.4.1 Without Losing Data?
The quick guide to downgrade iOS 13 is here. Follow the given steps below and you will find your device on iOS 12.
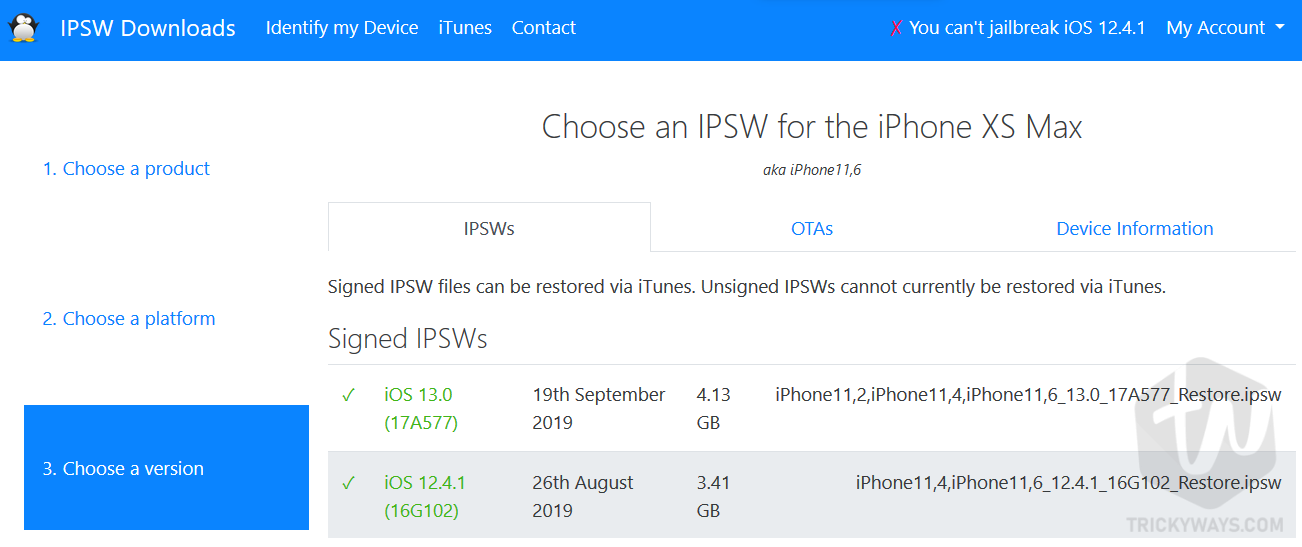
One important thing you need to know is that this method is only working if Apple is signing any iOS 12 version for your device.
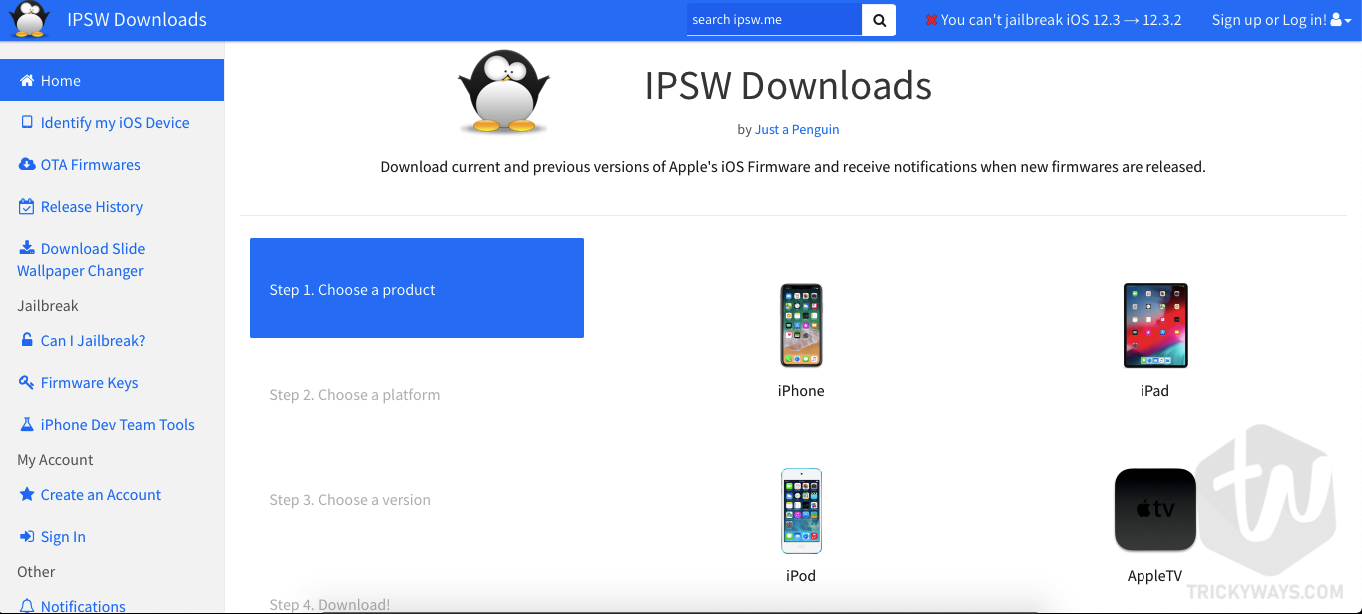
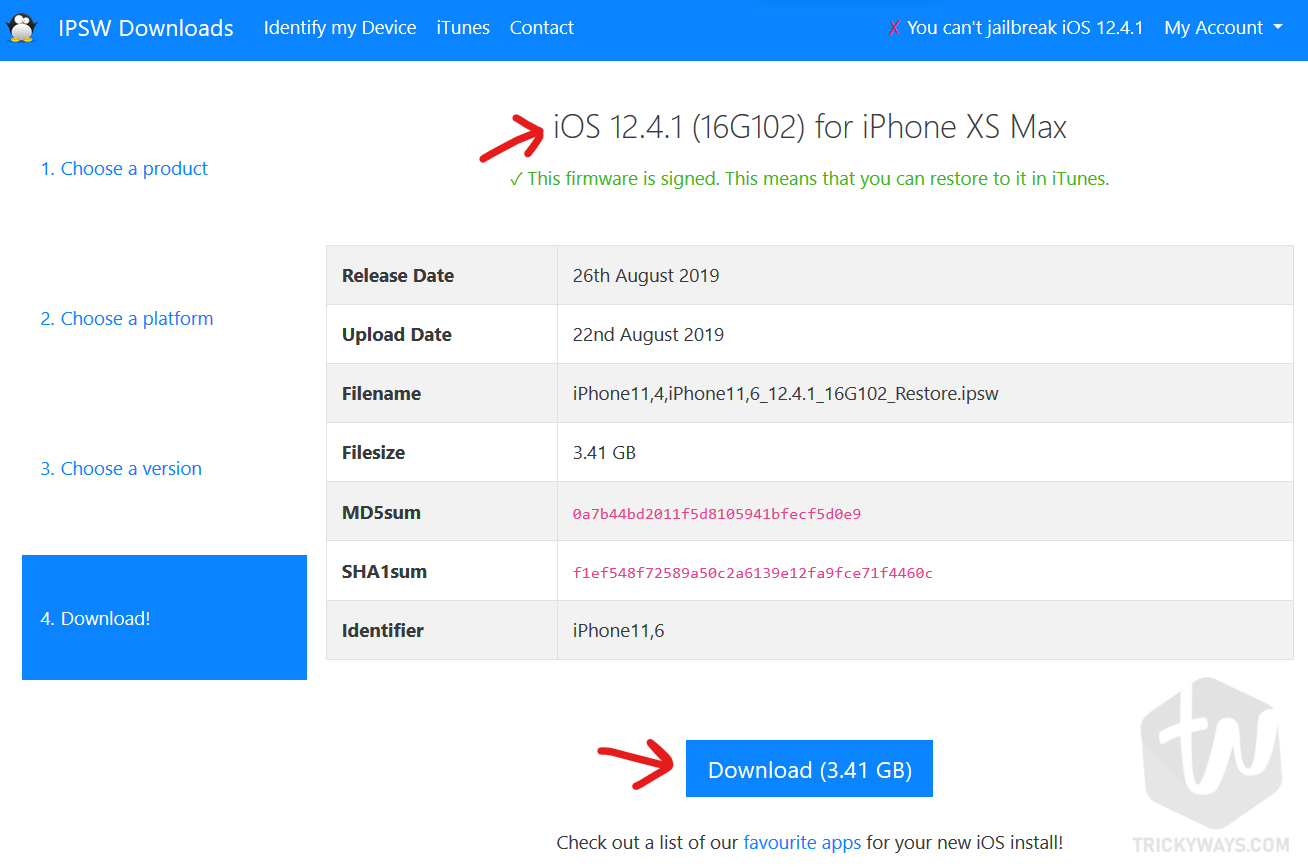
You can easily check the signed firmware’s for your device at any time on iPSW.me website. This site is popular over the internet. You can download iPhone, iPad, or iPod Touch Firmwares anytime. I am also going to use this site for downloading iOS 12.4.1 firmware. Let’s do this.
- At the very first, Go to iPSW.me website on your computer and Choose a product.

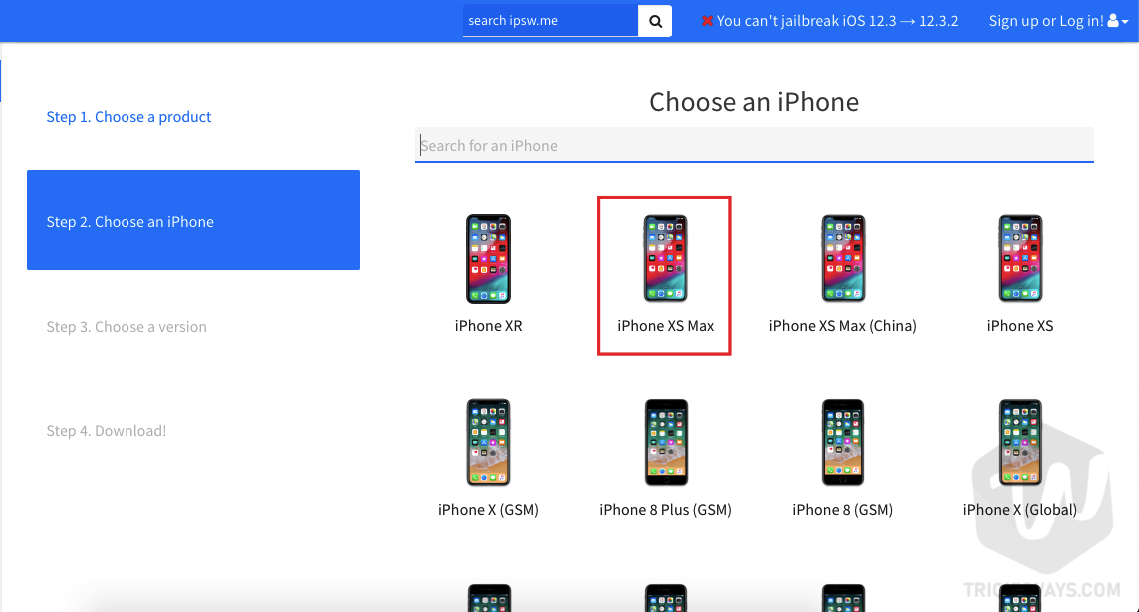
- After choosing a product, Select your device. I am choosing iPhone XS Max.

- Now check the signed firmware and download it.

- Click the signed firmware to Confirm and Download.

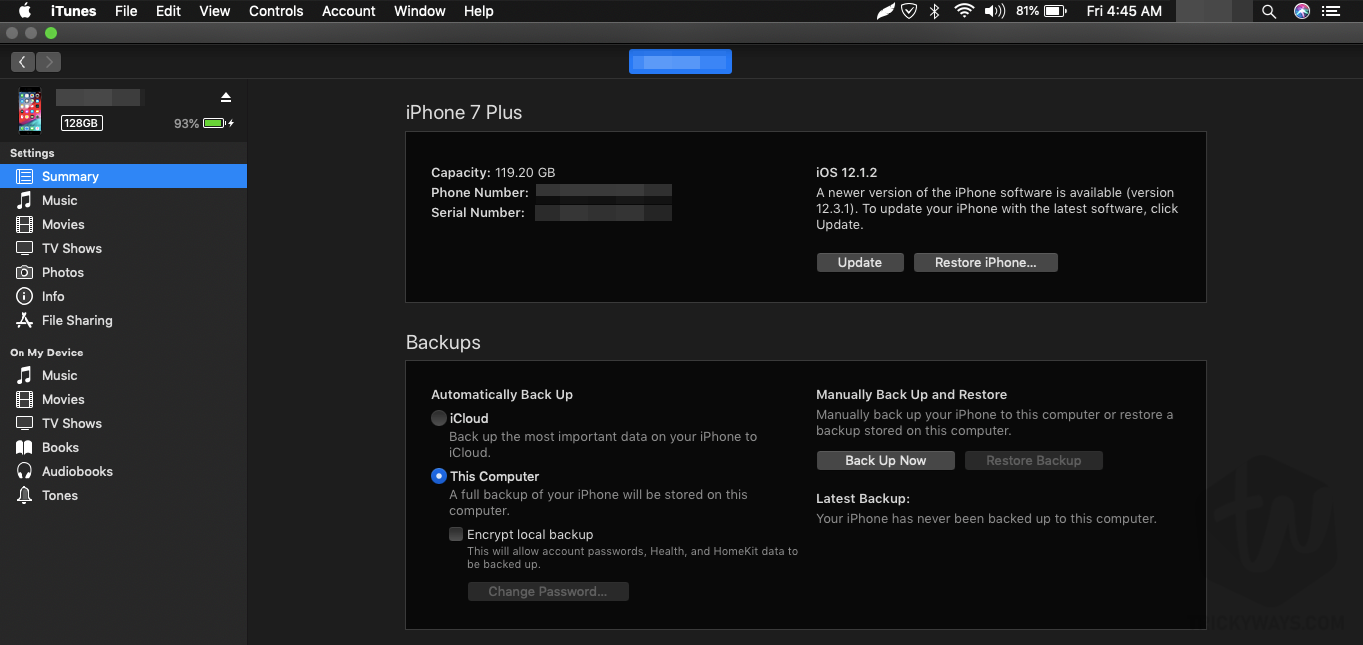
- After downloading the firmware Open iTunes and connect your device.

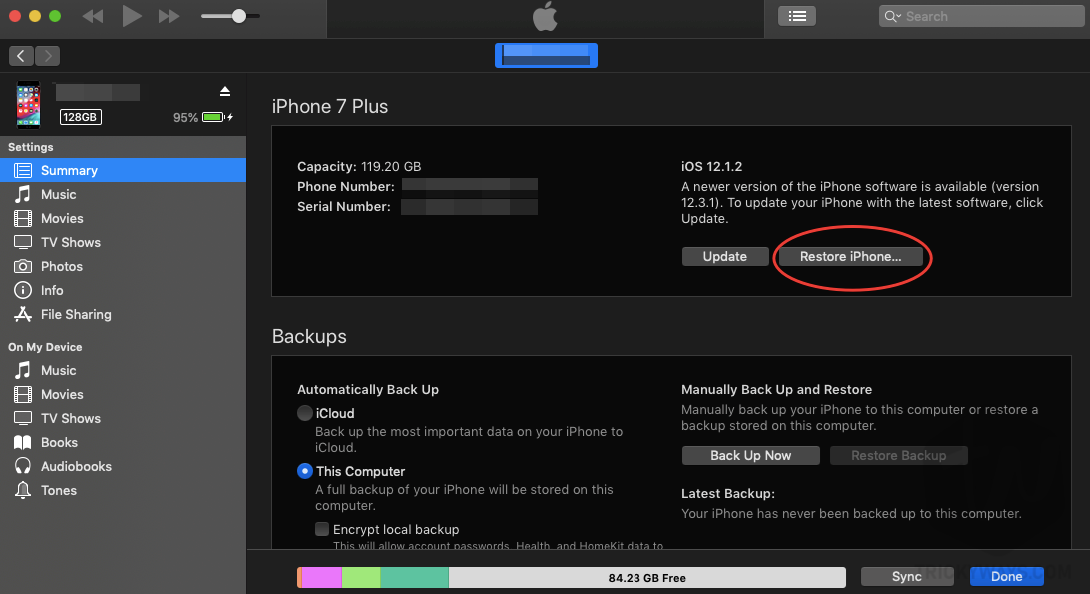
- After connecting your device, Hold Option Key for Mac OS or Hold Shift Key for Windows and Hit Restore or Check for Update button on iTunes.

- Now, Choose the downloaded iOS 12.4.1 firmware file and iTunes will restore your device in 10-15 minutes.
- Finally, activate your device if required and enjoy your device on iOS 12.4.1.
Now, do not update your device without knowing the final release. Final release comes with fewer bugs and much improvements. Also, you can turn off Automatic Updates on your device. For this, Go to Settings > General > Software Updates > Turn off Automatic Updates. This will prevent your device from automatic updates.
That’s all for today. If you have any questions, you can ask in the comment box below. Also, you can follow me on Twitter & ask anytime anything related to iOS.
Like us on Facebook. Subscribe to our Newsletter for more iOS 13 News, iOS 13 Jailbreak News, and other tutorials and guides for your iPhone, iPad or iPod Touch.