Learn how you can Create Windows 11 Virtual Machine using VirtualBox and bypass the error This PC can’t run Windows 11. I will explain it step by step, even a non-tech person can install Windows 11 as a virtual machine.
This guide is divided into the following sections:
- Download Virtual Machine software and install it.
- Download Windows 11 ISO file – latest version.
- Create a Virtual Machine using VirtualBox.
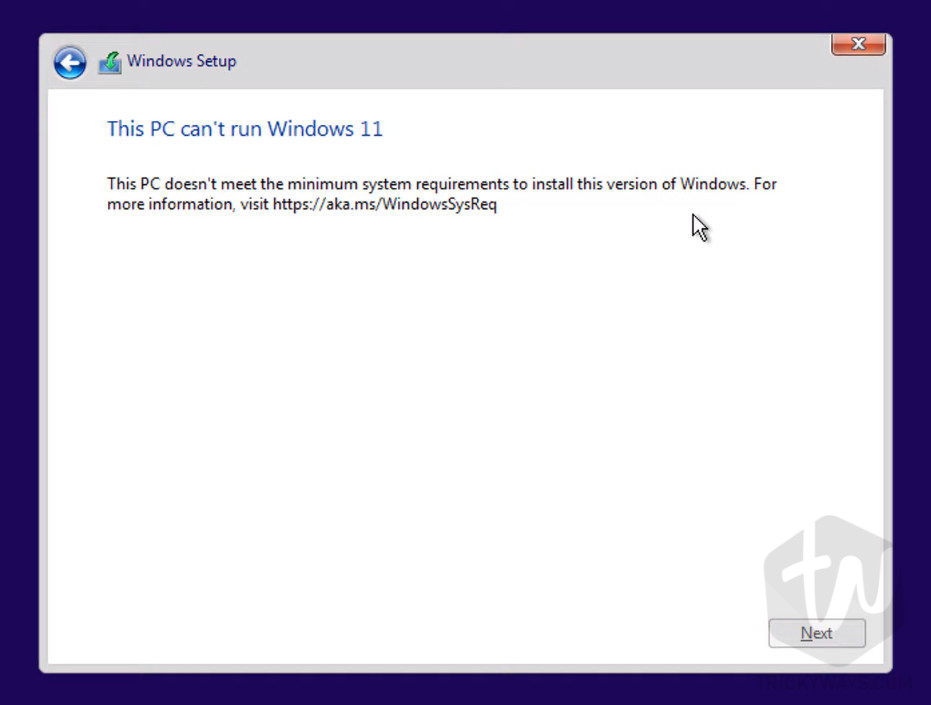
- Run Window 11 VM setup to install and fix error “This PC can’t run Windows 11”
This is a complete guide and fully tested, creating a virtual machine and testing Windows 11 will not disturb your existing working environment. What you need is, give some storage space to save the Virtual Disk file on your physical hard drive.
Fix for “This PC Can’t run Windows 11” error
I was gettings this error while installing Windows 11 as VirtualMachine in the VirtualBox, solution to that problem is also covered in this guide, continue reading to know how I Fixed this error message and install Windows 11 successfully.
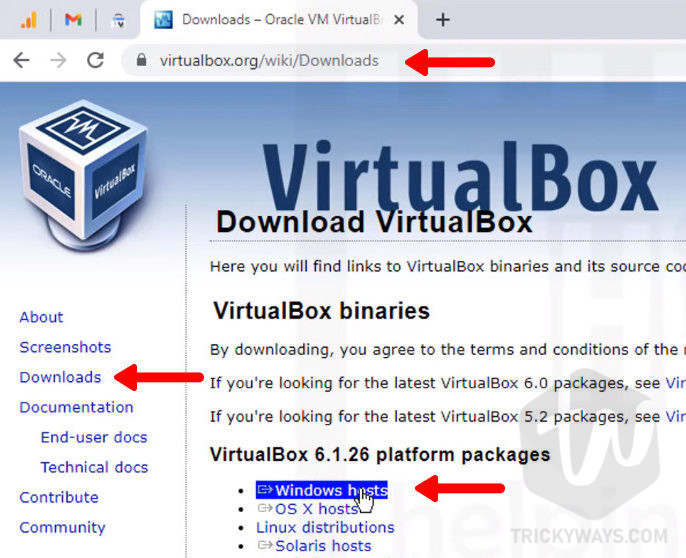
Download VirtualBox software
- Download and install the VirtualBox software, which is free to download and use to install Virtual Machines on your PC. So, go to virtualbox.org website > Downloads and then click the Windows Hosts link to download the software.
- Once VirtualBox is downloaded, run the setup and install it. Installation is basic, just follow the on-screen instructions to complete the setup.
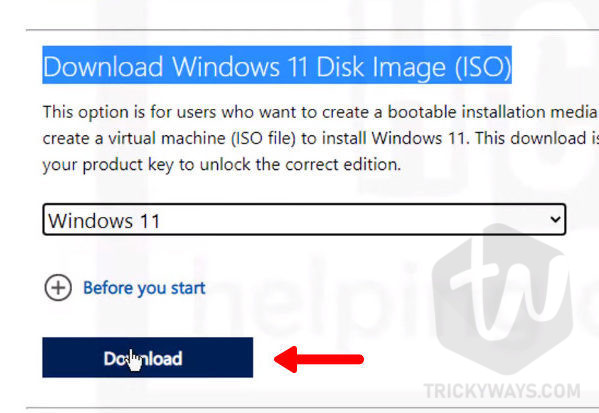
Download Windows 11 ISO File Latest Version
- Next, you also need to download the Windows 11 ISO file. So, go to microsoft.com/software-download/windows11.

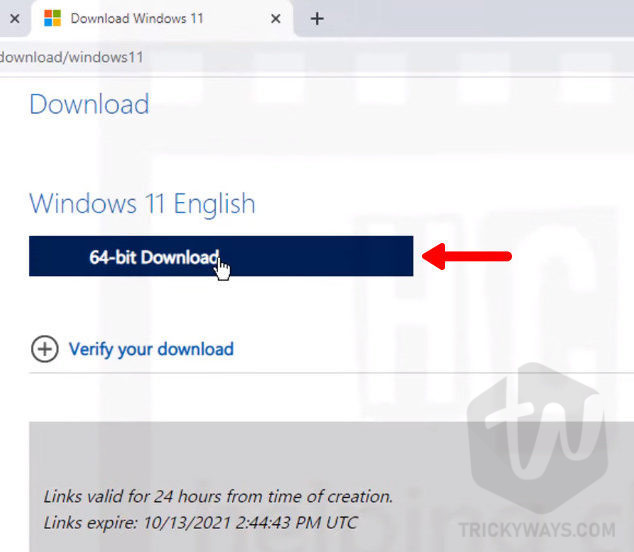
- Scroll down to the page section “Download Windows 11 Disk Image (ISO).” Click the Select Download drop-down menu and select Windows 11. Click the Download button.
- Next, select the product language and click the Confirm button.
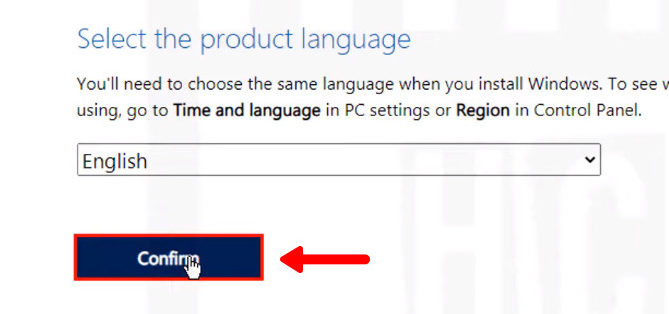
- This will generate a direct download link for the Windows 11 ISO file. This link is valid for 24 hours only, otherwise, you need to generate another link to download it.
Create Windows 11 Virtual Machine
- Open up the VirtualBox that you already installed. On the main screen click the New icon to start creating a new VM.
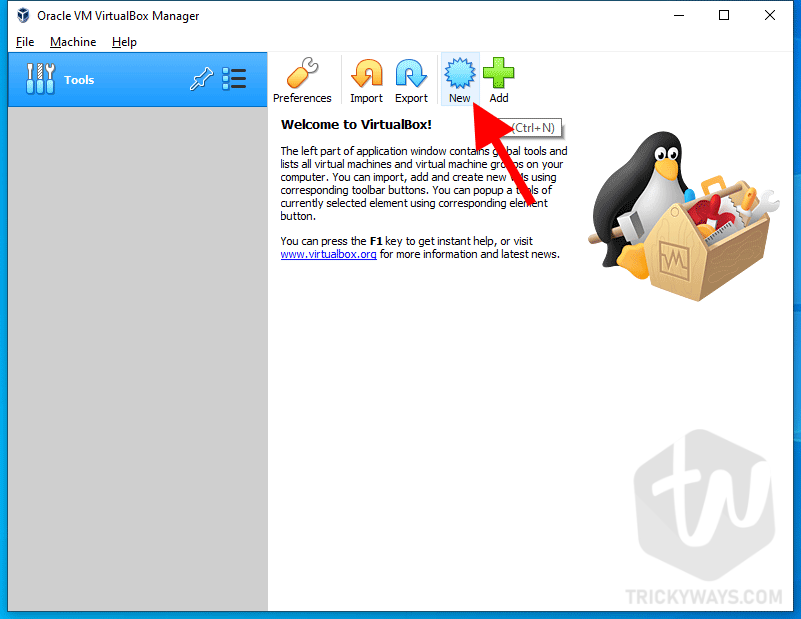
- This will open up a wizard to create a virtual machine.
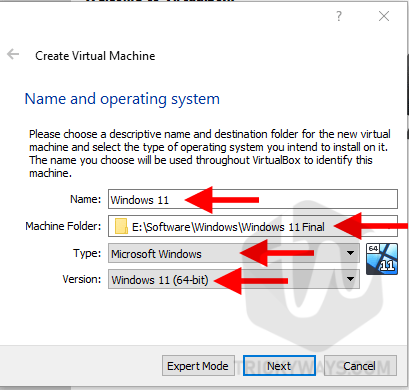
First, enter the name of the OS you want to install as a VM, likeWindows 11.
Select the Machine Folder, where it will save the virtual machine files.
Type:Microsft Windows
Version:Windows 11 (64-bit)
Once done, click the Next button.
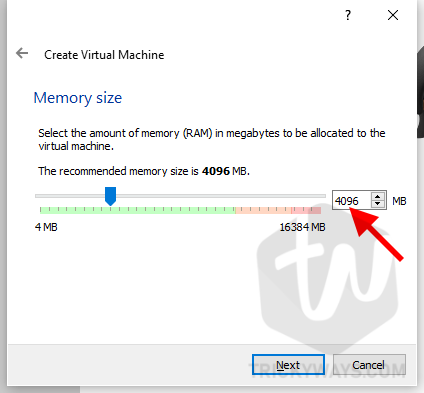
- Now, you need to set the memory size for the Virtual Machine, enter
4096which is 4GB.
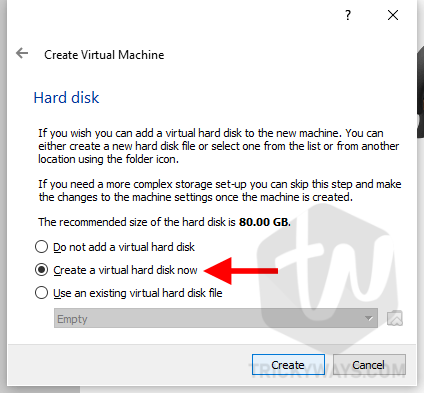
- On the Hard disk settings, select the
Create a virtual hard disk nowoption and click Create.
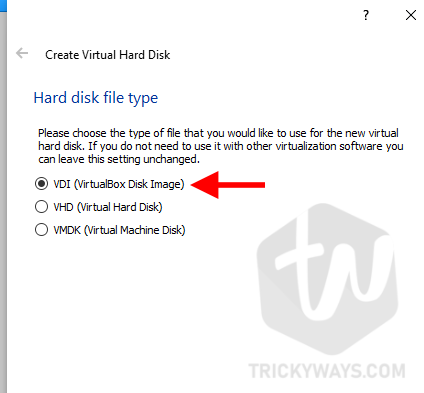
- Select,
VDI (Virtual Disk Image)as a hard disk file type, and click Next.
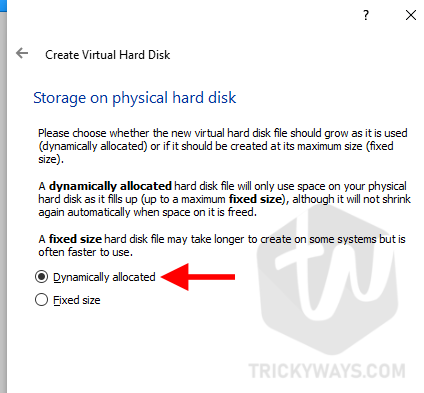
- Now, you need to select how do you want to allocate storage on your physical hard disk. The recommended option is
Dynamically allocated. When you select this option it will only use the hard disk space as it fills up (up to a maximum fixed size.) Select the option and click Next.
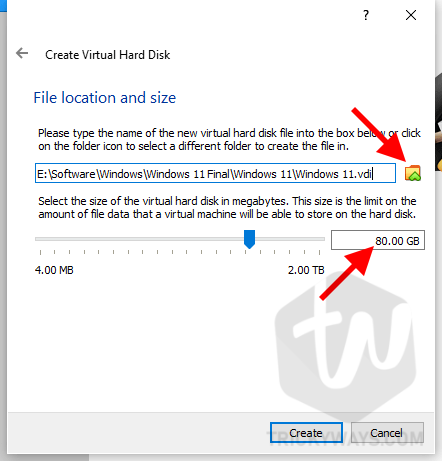
- Set the virtual disk file location and the size,
click theYellow folder iconand select a location for the virtual disk file.
Enter80.00in the virtual disk size box.
Once done, click the Create button.
- You have created a Windows 11 virtual machine successfully and it is available on the main screen of VirtualBox software. Before starting the VM you need to confirm a few settings for the Windows 11 VM.
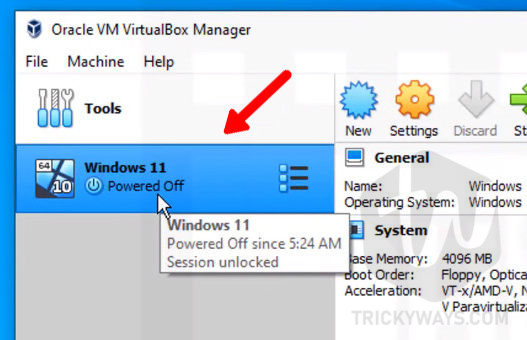
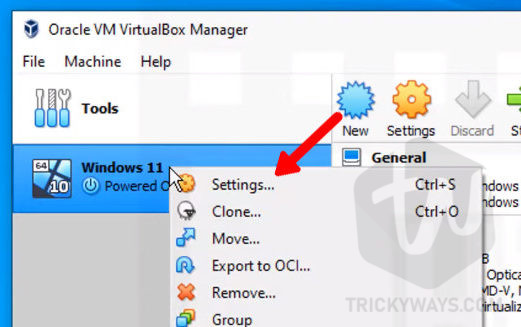
- So, right-click on the Windows 11 VM and select Settings.
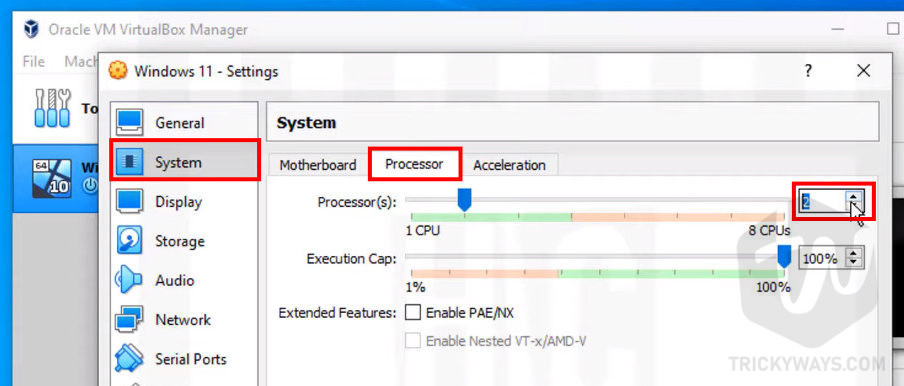
- Select
Systemfrom the left side, click theProcessortab on the right side, and make sure the number of CPUs is 2.
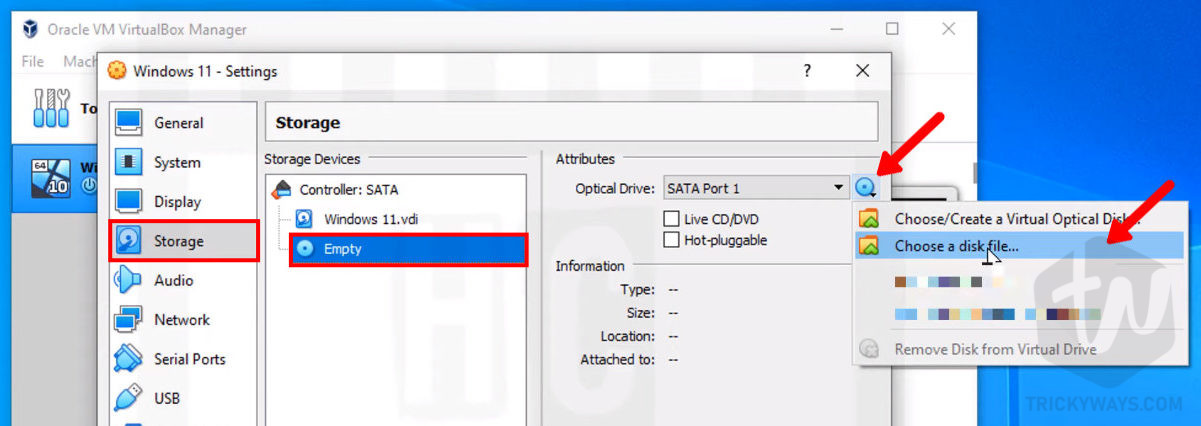
- Next, click the
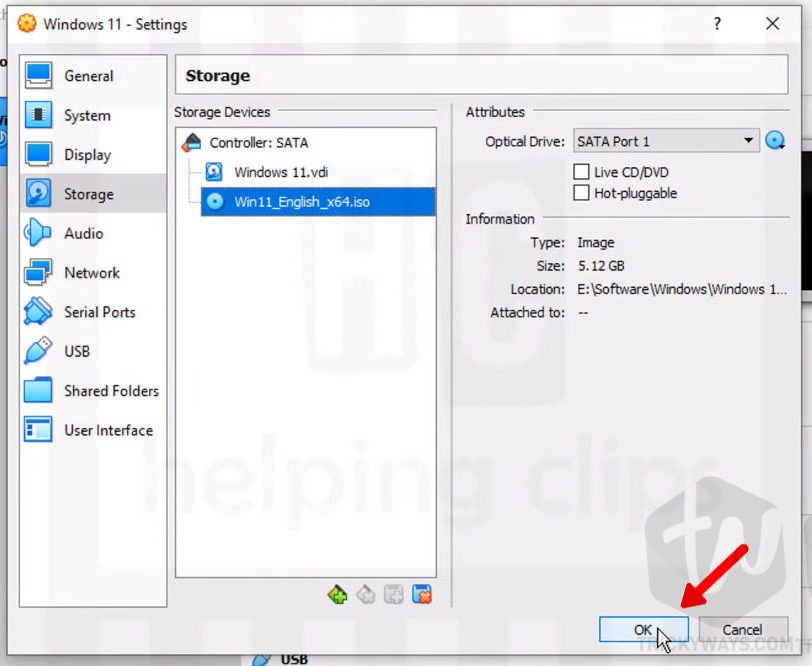
Storagefrom the left side and selectEmptyunder the Storage Devices section on the right side. After that click theBlue Optical Driveicon and select theChoose a disk file...option as you can see below in the screenshot.
- Locate the Windows 11 ISO file that you downloaded earlier and select the ISO file and click the Open button.

- As you can see the ISO file you selected is now in the list, just click the OK button.
Installing Windows 11 VM on VirtualBox
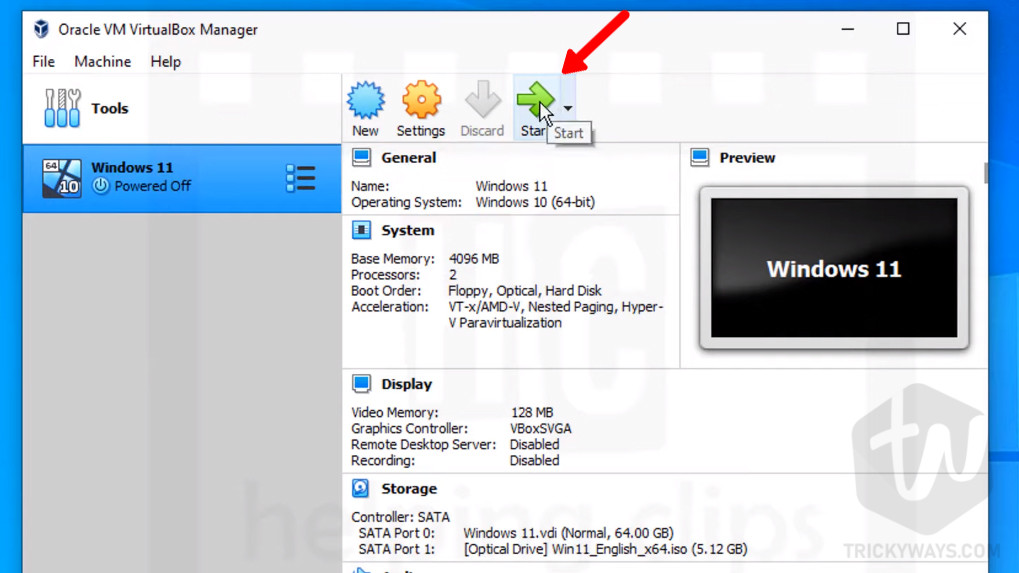
- Now, you have completed all the steps to create a VM of Windows 11. Next, we just need to start the VM to run the Windows 11 setup as a virtual machine. Select the Windows 11 VM name from the left side, and click the Start button.
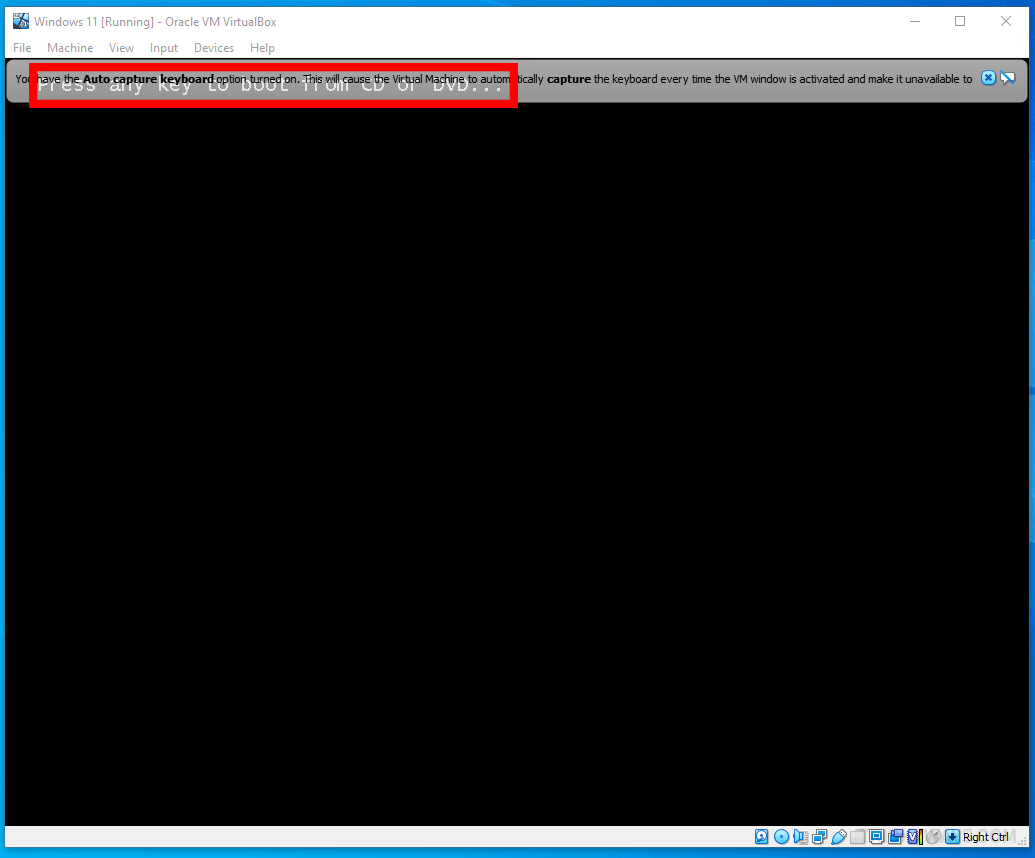
- When you start the VM, this may ask you: “Press any key to boot from CD or DVD…” So, when you see this message click inside this window and press any key from the keyboard like the Enter or Spacebar. In case you are unable to press the key in time, click the Machine menu and select the Reset option to restart the VM and try again.
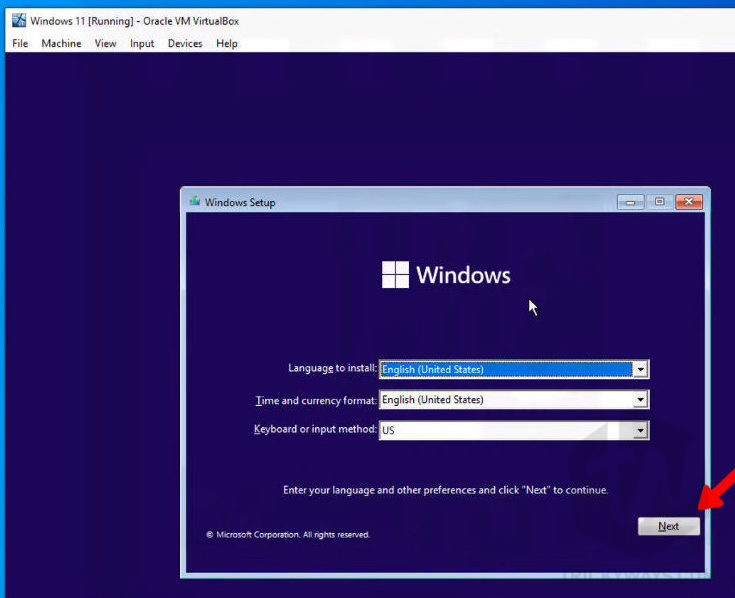
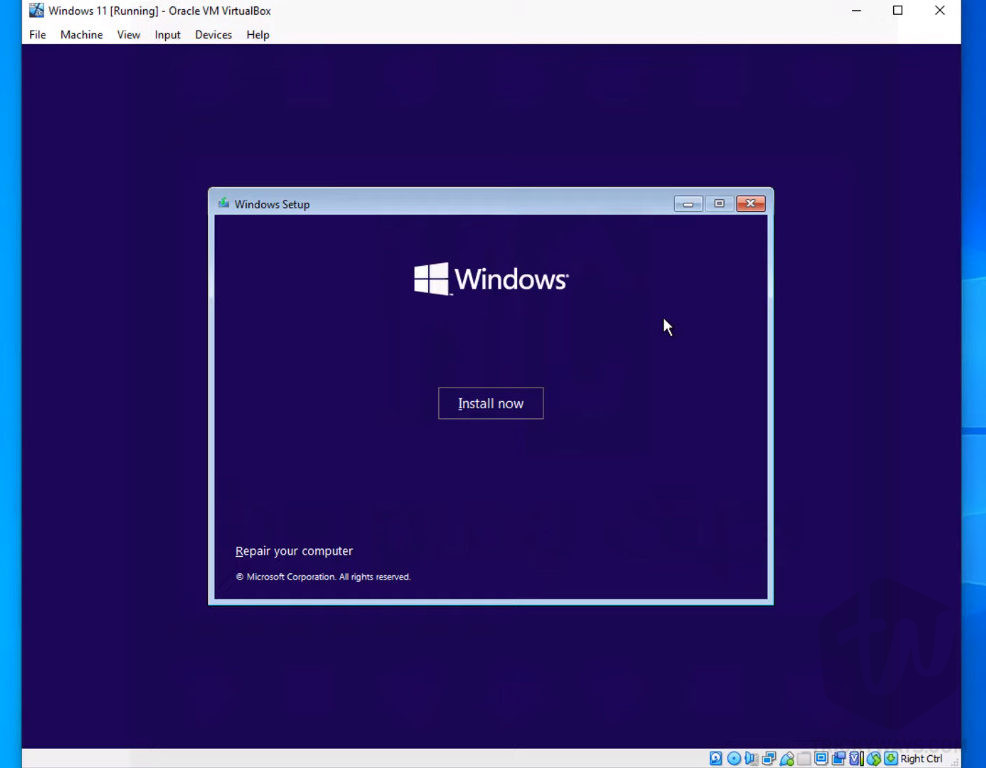
- Once you successfully press the key to boot from CD/DVD, you will see the Windows Setup screen. Here, select the language, time, keyboard, and click the Next button.
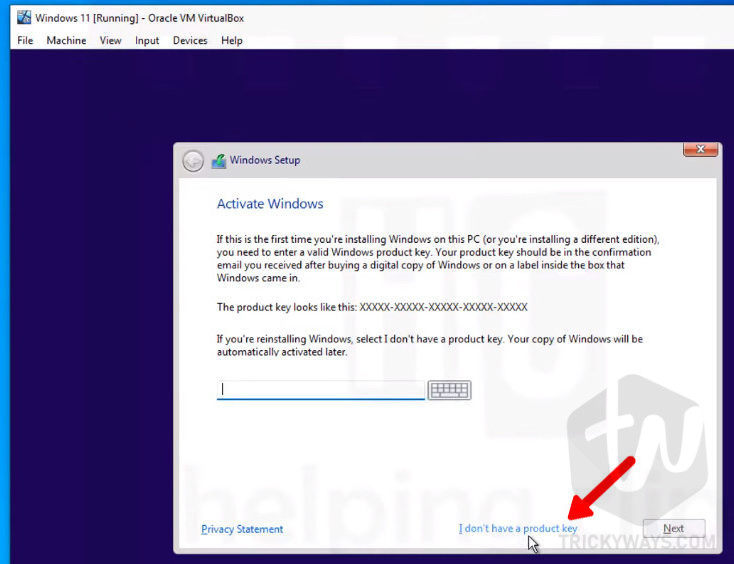
- On the next screen click the “I don’t a product key” button.
- Now, select the operating system you want to install like Windows 11 Pro, and click the Next button.
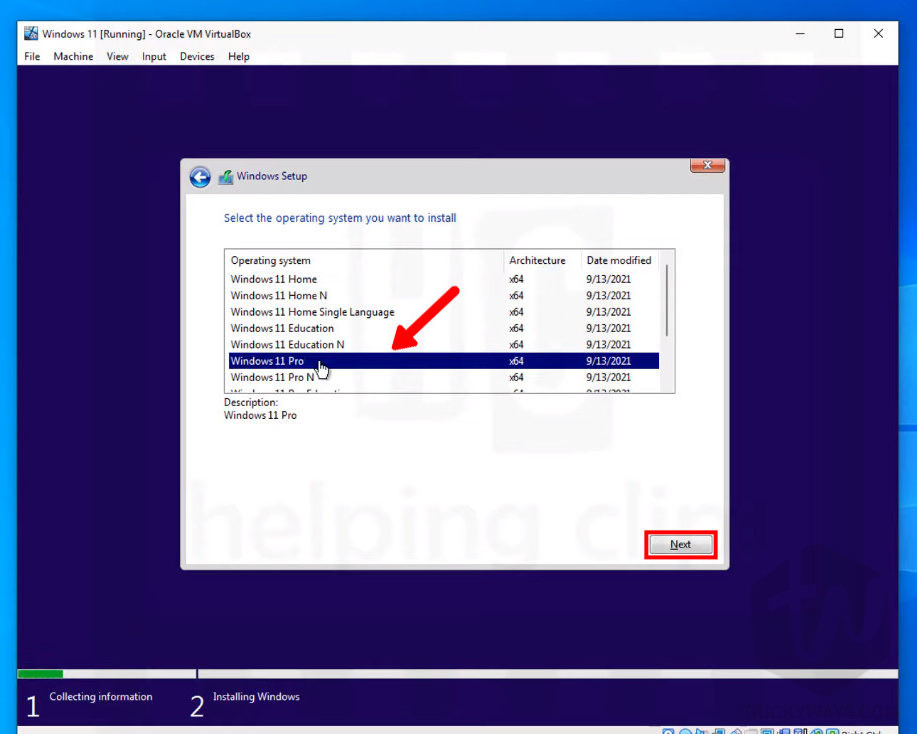
-
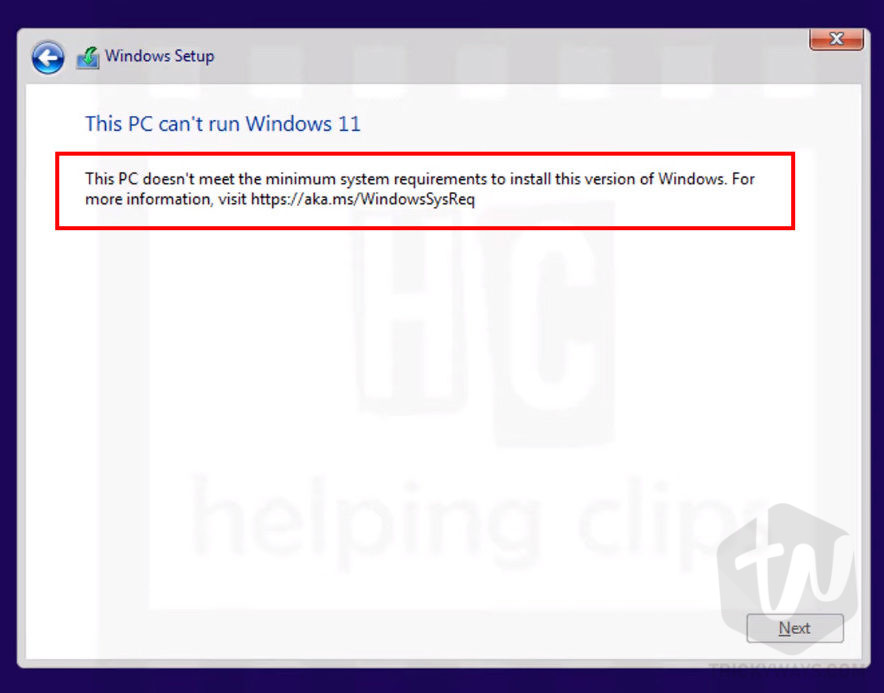
Fix This PC can’t run Windows 11 error
During the Windows 11 Setup, I got this error “This PC can’t run windows 11, This PC doesn’t meet the minimum system requirements to install this version of windows…” If you are gettings the same error in VirtualBox then here is how to fix it. If you didn’t get this error then skip to the license and agreement step-21.
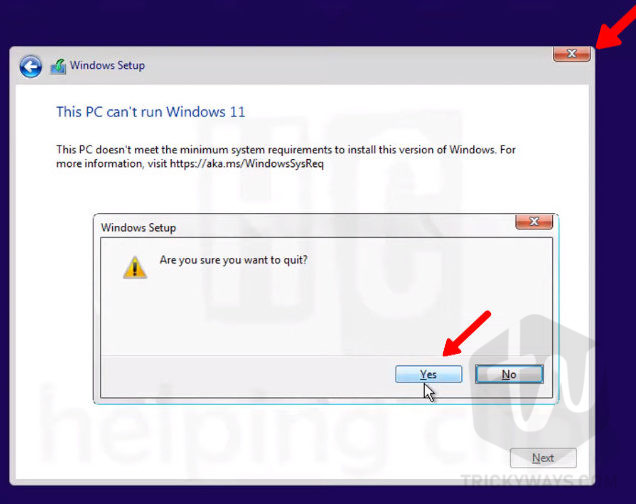
- So, just close the error window, click Yes to quit.
- Once you are back on the Install Now screen, we need to open the Registry Editor here. So, press the
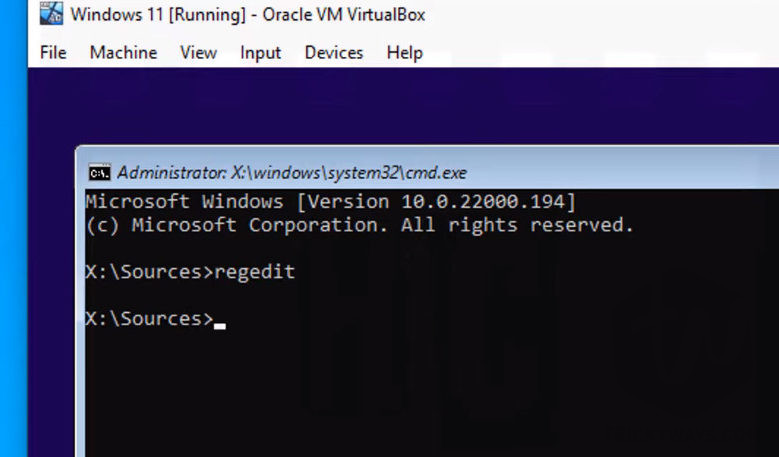
Shift+F10keyboard shortcut and this will open up the Command Prompt window.
- In the Command Prompt, type the command
regeditand hit Enter key to execute it.
- You will see the Registry Editor. In the registry got to the following path:
Computer\HKEY_LOCAL_MACHINE\SYSTEM\Setup
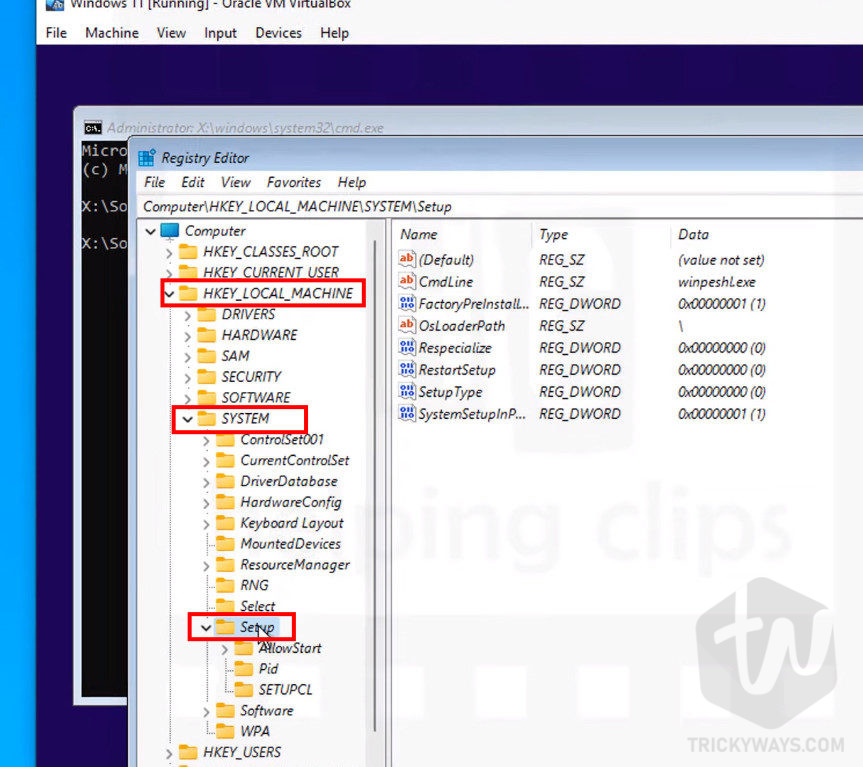
- Create a new Key in the
Setupfolder, Right-Click on theSetupfolder and selectNewand then clickKeyoption from the menu.

- Give it a name:
LabConfig, make sure you type the key name exactly and follow the lower and upper case letters.
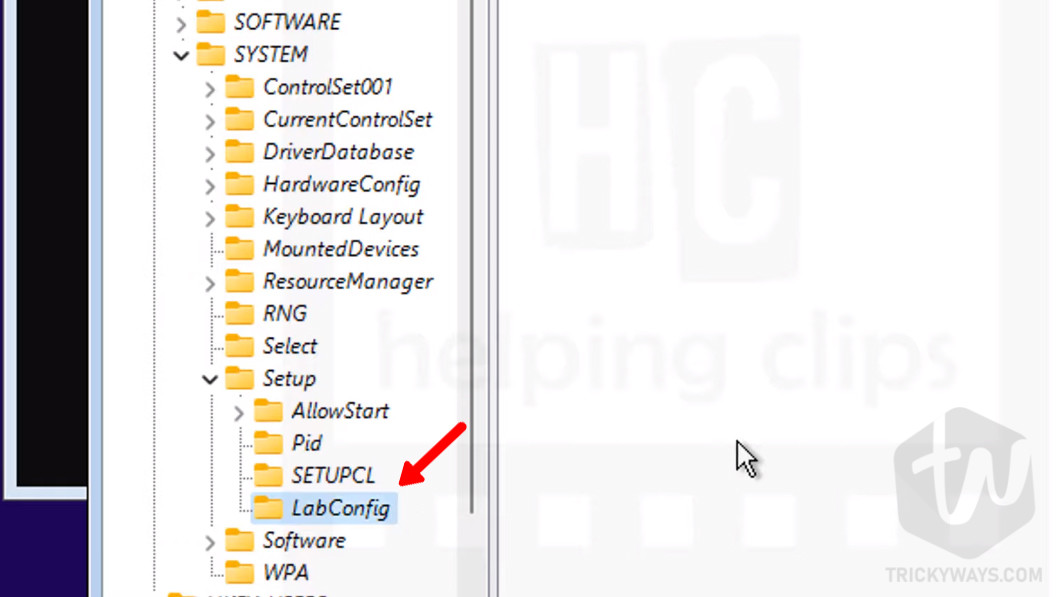
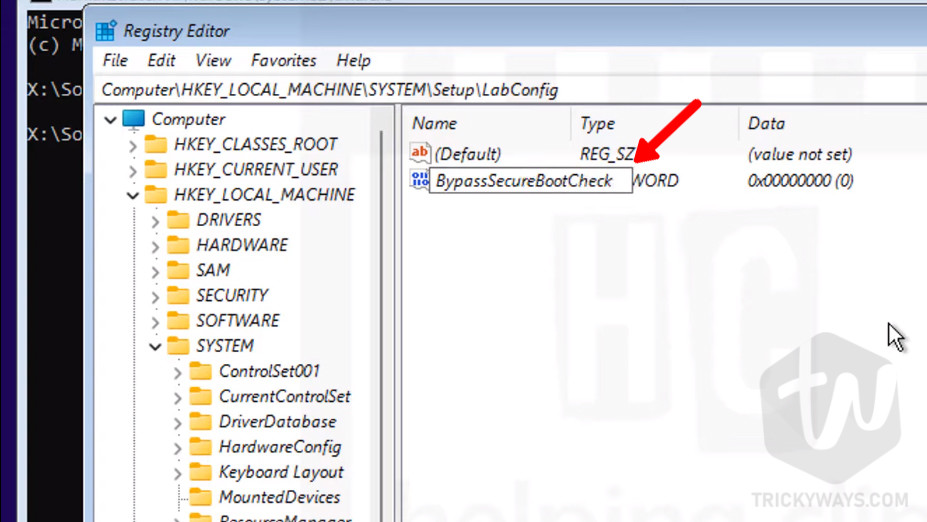
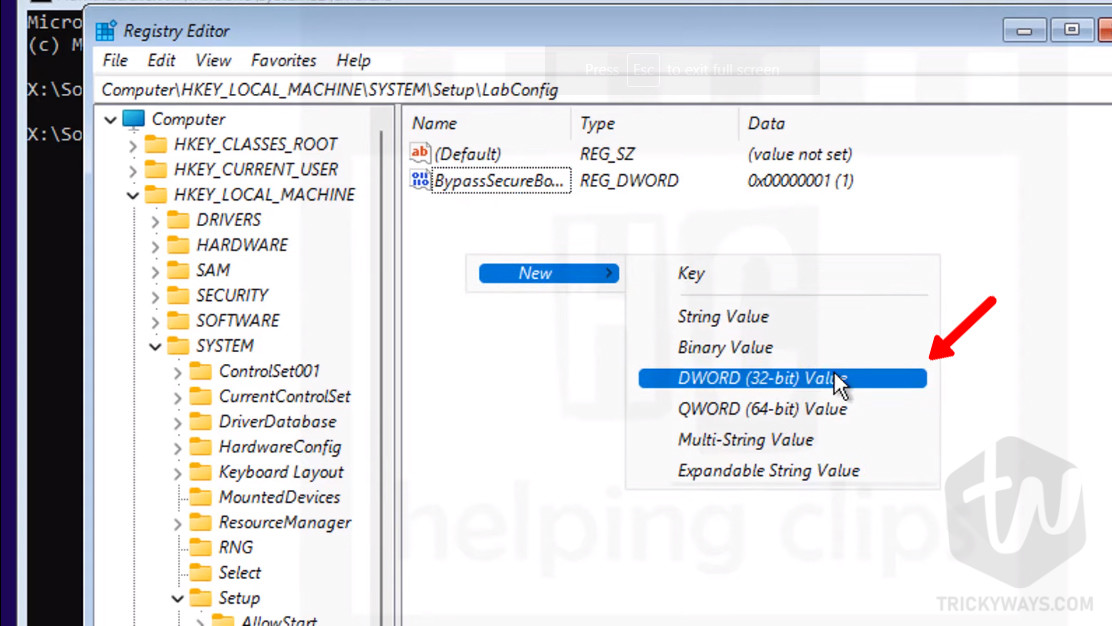
- Select the
LabConfigthe folder you just created, and right-click on the right side and selectNewand then clickDWORD (32-bit Value)option from the menu.

- Enter then name
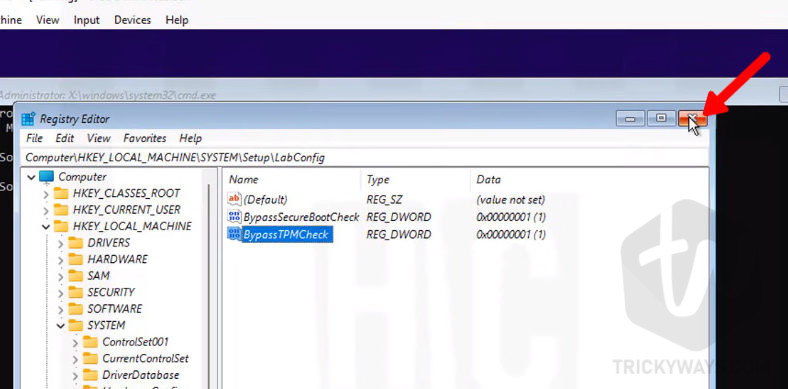
BypassSecureBootCheck, and hit enter. Double click the DWORD value you just created or Right-click on the value and selectModify...the option.
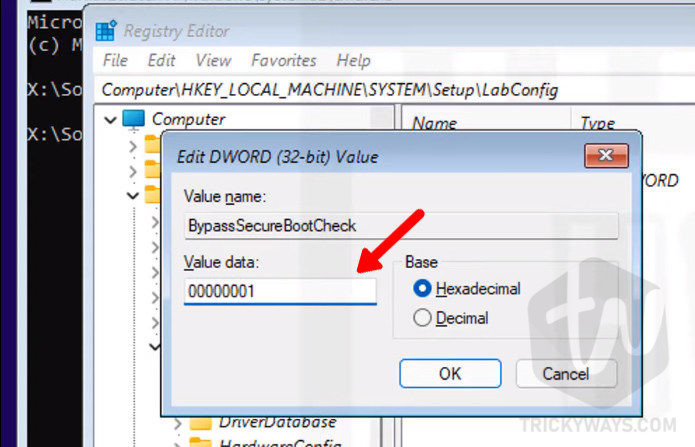
- In the Value data text box type this value: 00000001 and click the OK button.
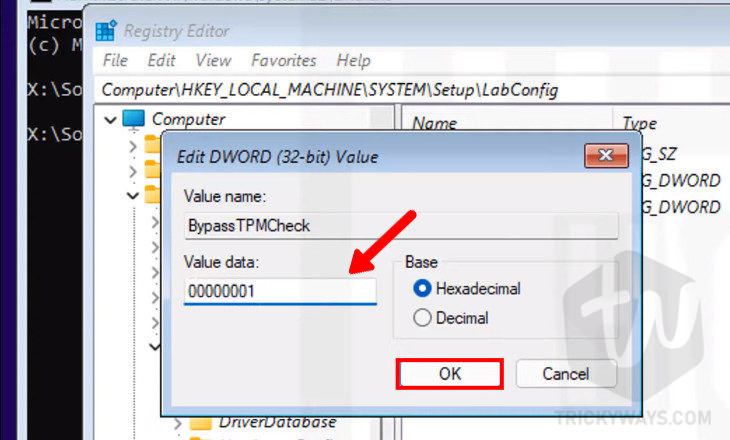
- Create another DWORD (32-bit) Value.
- Type the name,
BypassTPMCheck, and hit enter to save. To modify the value just right-click on it and selectModify...the option.
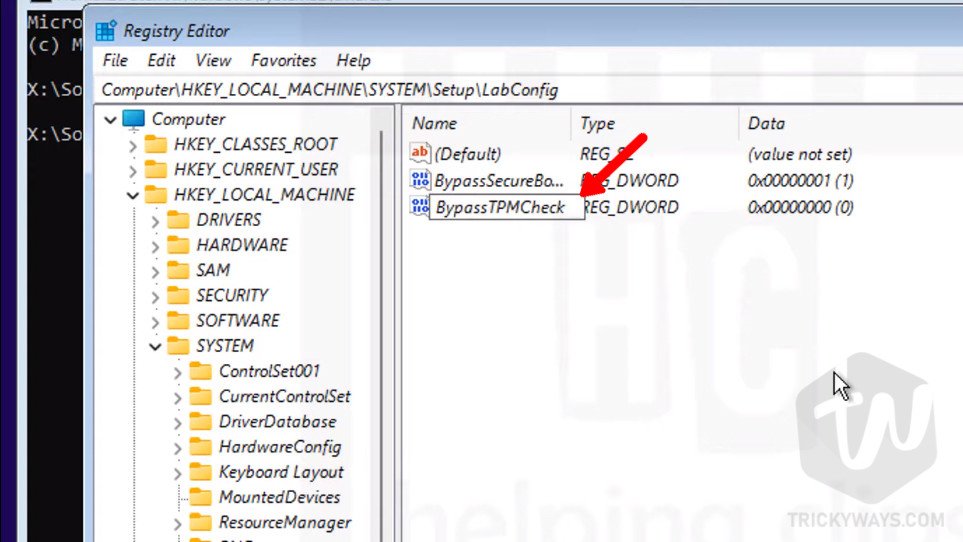
- In the Value data box type 00000001 and click the OK button to save the value.
- That’s it, just close the registry editor and close the Command Prompt window.
- Click the Install Now button and follow the on-screen instructions.

- This time you will not get this error: This PC can’t run windows 11. So, just click the “I accept the Microsoft Software License Terms…” check box and click the Next button.

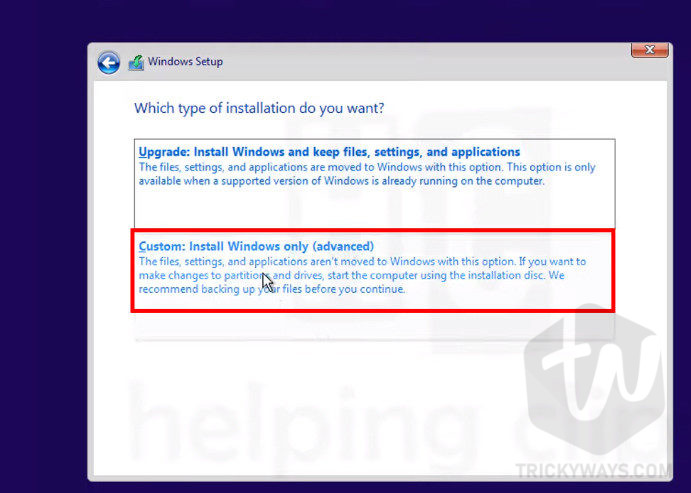
- Next, click the “Custom: Install Windows only (advanced)” option.
- Click next on the screen “Where do you want to install Windows?”
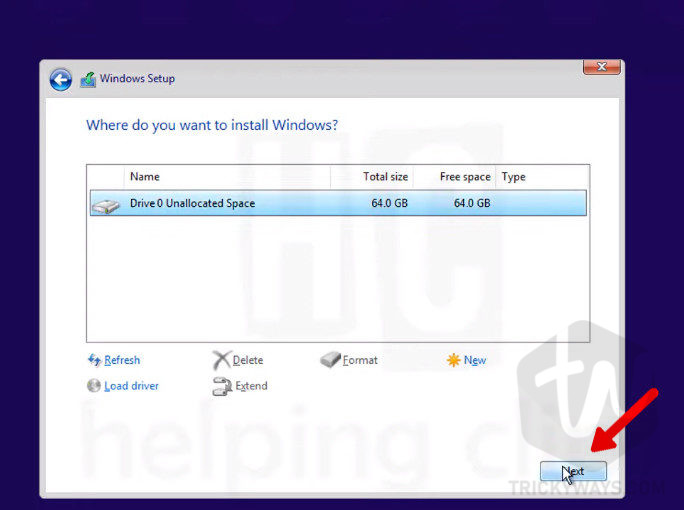
- As you can see the Windows setup is just started installing Windows 11 in the VirtualBox. This installation may take some time.

You have to wait for it and VirtualBox will restart the Virtual Machine couple of times to complete the installation. Once, the installation process is completed this will start the initial Windows 11 setup screen, where you need to set the Windows 11 settings like your Account, WiFi, etc. What you need to do is just follow the on-screen instructions to complete this initial setup.
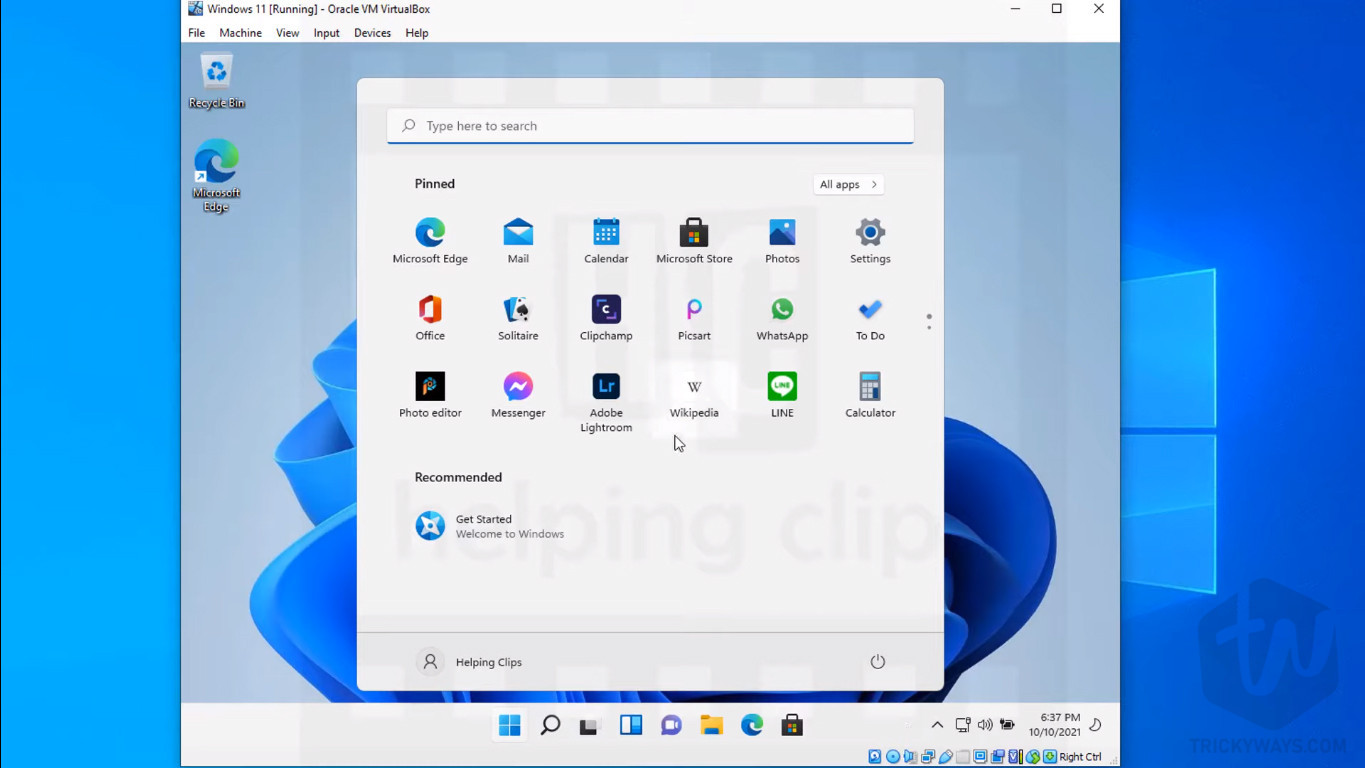
Finally, you will be landed on the desktop of the Windows 11 Virtual Machine.
Must see: How to make VirtualBox VM full screen
Was that helpful? please leave a comment below.
This method works 100% and I have tested with the latest versions of Windows 11 ISO and VirtualBox software. If you still having any issues creating Virtual Machine then leave a comment below and we will happy to answer your questions and solve the problem.
Dude, thank you so much! I’ve been trying to create this virtual machine for a couple days because I just wanted to check out Windows 11 a little. Tried on a couple different virtualization apps. Tried tweaking some of the settings, as suggested by some other sites, but nothing worked. So grateful for the help.
Good to hear that, you are welcome.
Nice tips!
Thank you
Thanks a lot for the tutorial. I tried installing Windows 11 in VirtualBox using other instructions a couple of times without success, but your instructions worked perfectly the first time.
Worked like a charm
Glad to hear that.
Dude, thank you! This worked like a charm