Anything you delete from your computer gets into the Recycle bin until you are forced to delete it permanently. Every time you have to keep an eye on the recycle bin and empty it manually. Instead of doing it manually, you can automate this process and Windows will delete the Recycle bin file automatically after a specific time. Let’s see how to automatically empty Recycle Bin in Windows 11.
How to Set Recycle Bin to Automatically Empty
In this guide, we will use the Storage Sense feature of Windows 11 to automatically delete then unwanted files from your PC. This feature helps you to clear different files from your PC like the files you deleted, the downloaded files, and much more.
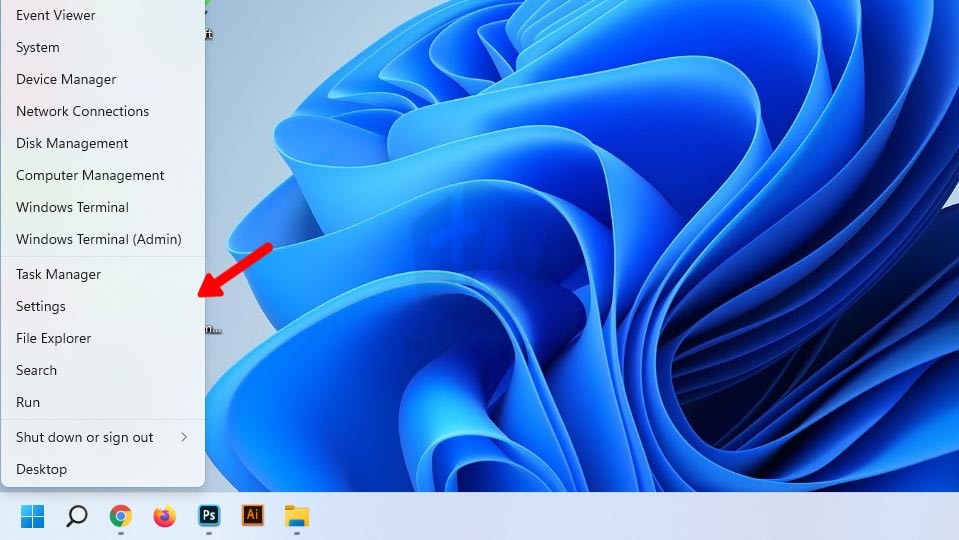
- Right-click on the Start button and select
Settings. You can also pressWindows + Ifrom the keyboard.

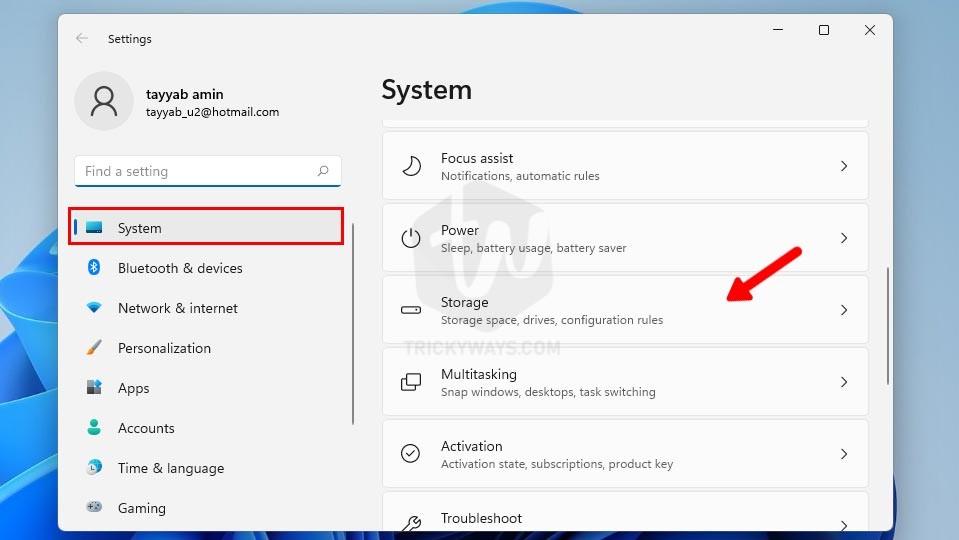
- On the Settings windows click the
Systemoption on the left side, and then scroll down a bit and click theStorageoption on the right side.
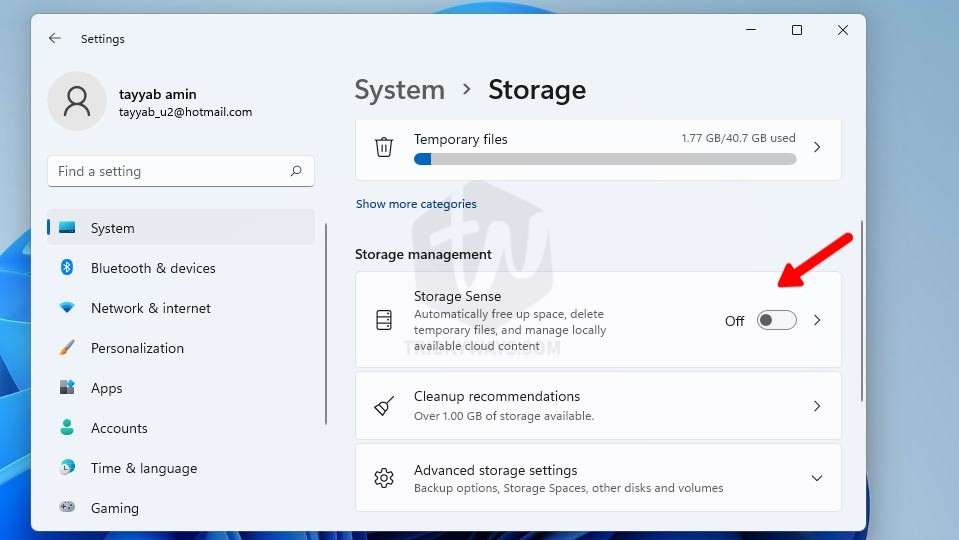
- Next, under the Storage management section, select
Storage Sense.
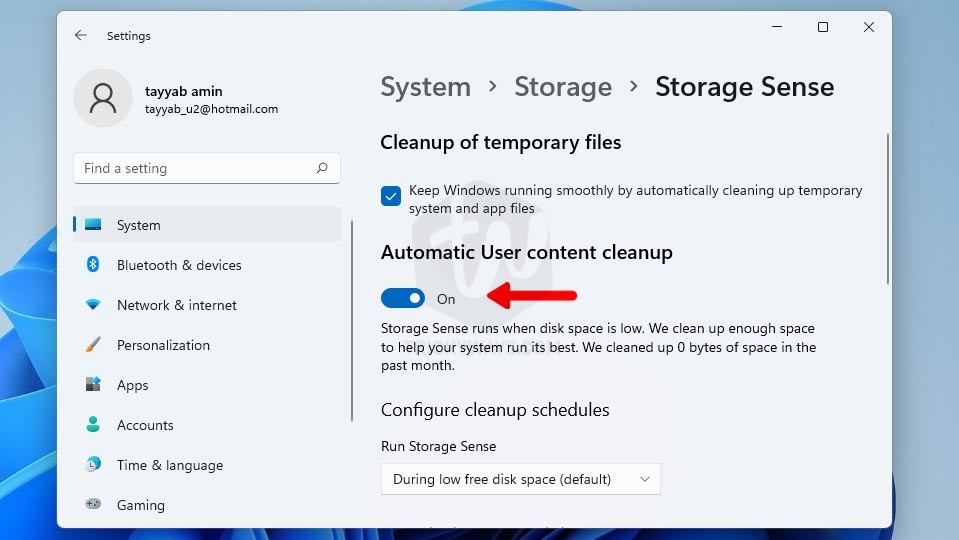
- On the Storage sense settings screen, turn on the
Automatic User content cleanup. By default, it runs and frees up storage space when disk space is low. But you can schedule it to run frequently and clean up the deleted, temporary system and app files.
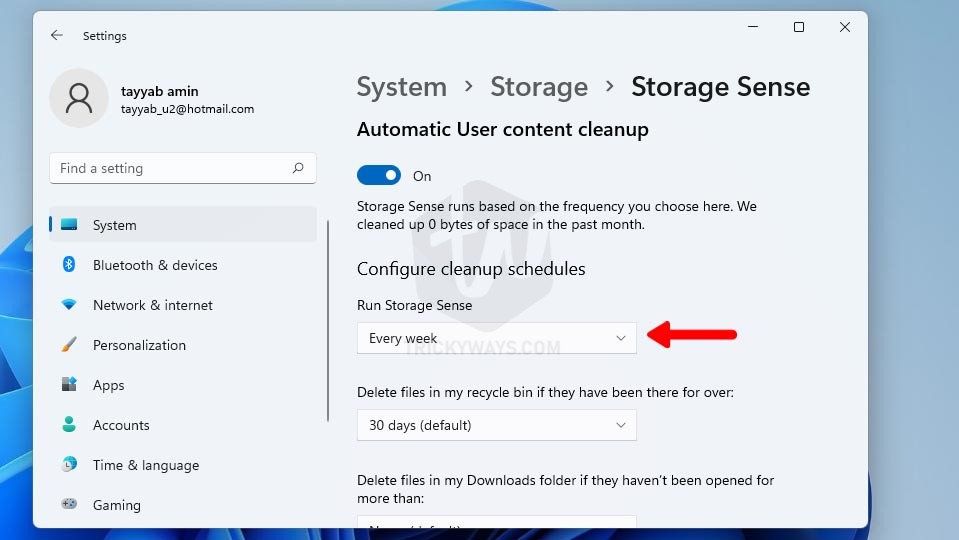
- Under the Configure cleanup schedules, you choose how frequently to check for the files and delete them.
As you can see below I choose to Run Storage SenseEvery week.
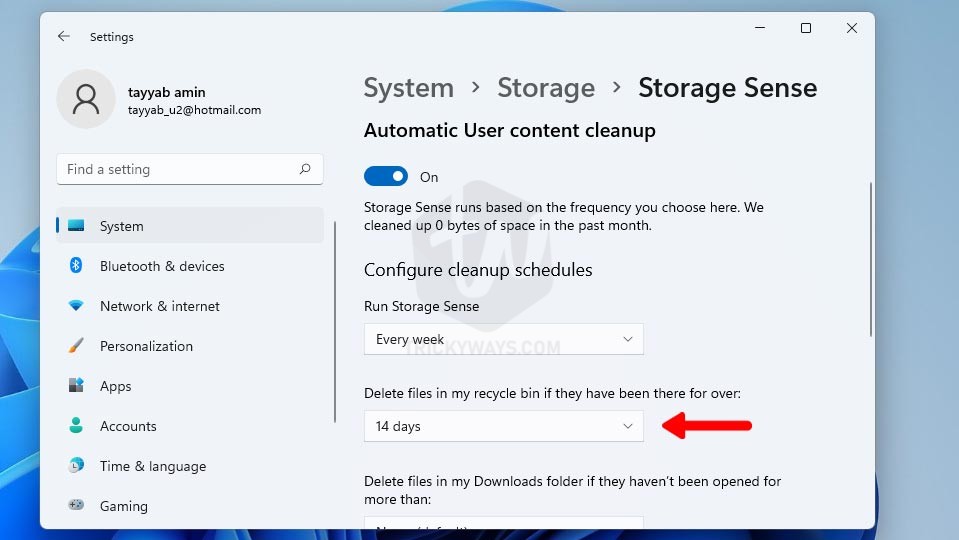
- I choose to Delete files in my recycle bin if they have been there for over 14 days, by default it was 30 days.
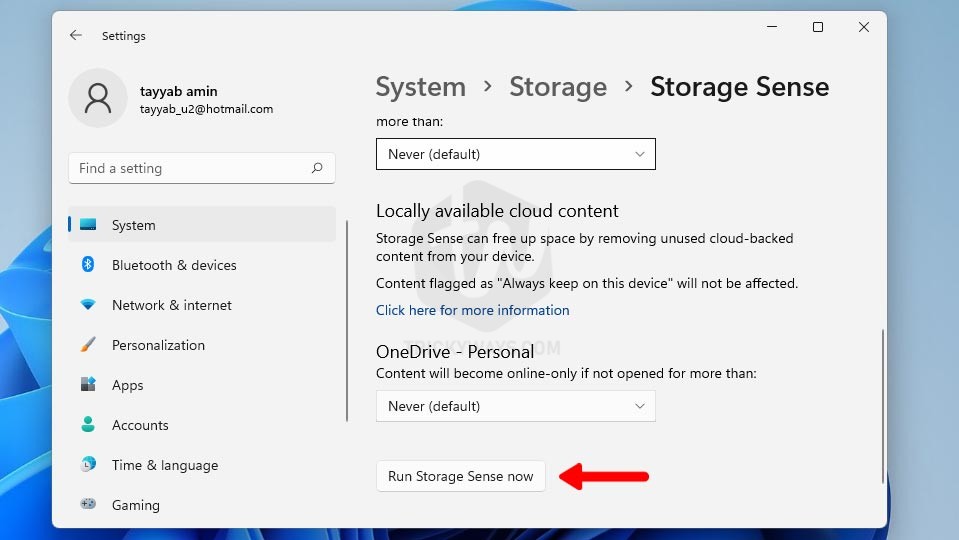
AdvertisementNote: When you enable the Storage Sense option it does affect the Downloads files. So, make sure you have selected the right option for the Downloads folder as well. - Now, the Storage sense is enabled and schedule time is set. If you want to run clear the files right now then click the
Run Storage Sense nowbutton.
Now, you have successfully scheduled Storage Sense to check and delete the trashed files from your PC automatically.
If you found this storage sense guide helpful or you have any related questions please do leave a comment below, Thanks.
FAQs:
There are a few answers to your questions you may looking for.
Which files Storage Sense can delete?
When Storage Sense is Enabled it can scan the locations and search for the unused files in the system and delete them according to the settings you choose. The locations Storage Sense search for are the Recycle Bin, Download Folder, and Windows temporary files folders. When your PC is out of storage space then Storage Sense can search for the following files:
- System or Internet cache files.
- The temporary system, internet, or setup files including device driver packages.
- System Error and log files
- Windows update files and more.
Windows 11 automatically empty Recycle Bin but also Downloads files.
If you don’t want to clean the downloads files then make sure you selected Never for “Delete files in my Downloads folder…” below the Recycle bin option, see the screenshot step-6 above.
Can I customize Storage Sense and select what to delete?
Yes, you can customize the options in the Storage Sense settings to delete Recycle bin only but not the Download files.
Getting notifications to turn on Storage Sense, Why?
You are receiving this notification if your disk running out of space. You must have free space on your drives to run Windows smoothly and up to date.