Facebook is most popular social networking site there are different ways to upload photos on Facebook to create your album. In this step by step guide you will explore those different options
Upload Photos to Facebook
Step-1
Go to www.facebook.com and sign in with your Facebook ID and password.

Step-2
Click on “Photos” icon from left navigation, Photos icon may be hidden click on “See more” link in left navigation.
Step-3
Click on “Upload Photos” button the header.
Step-4
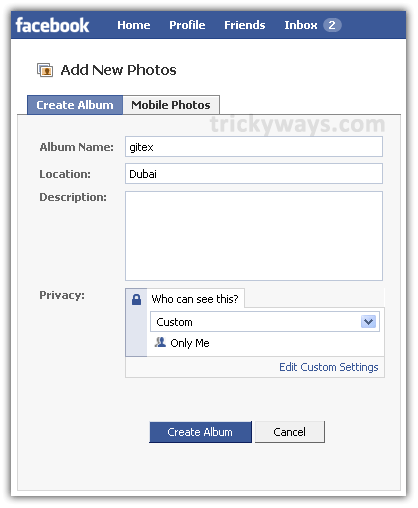
Enter the required Facebook album information such as the album name and privacy settings and click “Create Album“.

Step-5
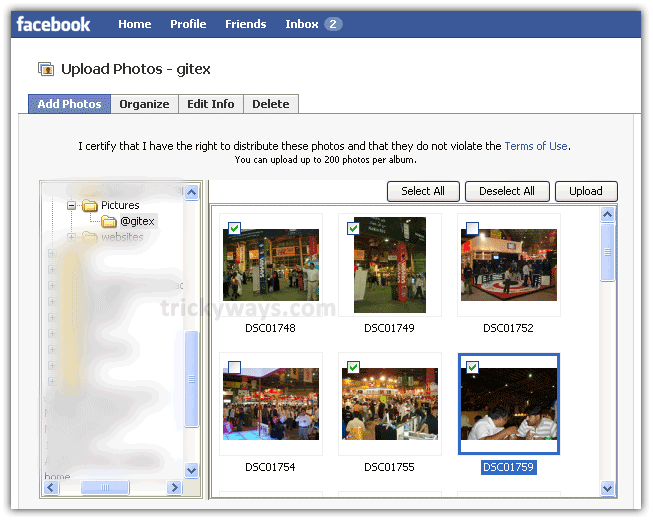
In this step you will be upload album pictures from your computer. Find the pictures folder from left side and select the images that you want to upload from right side panel and then click “Upload” button (this uploading interface required Java Run Time Environment installed on you computer, if you don’t have JRE then “Try the Simple Uploader” see next step)

You can also upload picture by “Try the Simple Uploader” link at the bottom of the upload window. In this method you have to select images from computer, click “Select Photos” button
After selecting the photos click on “Upload Photos” button
Step-6
You can either publish the Facebook album to let your friends know now, or wait until later when you’ve finished editing your album, adding comments, and tagging your friends. Click on image thumbnail to start tagging your friends.

I can’t do it its not the same as yours..
why cant u its same try again
verey good