Here’s how you can easily add funds to your Apple ID using iPhone, iPad or Mac.
Another day, another amazing tutorial for iOS users who really wants to hear something new from us. If you are our daily blog visitor and like our content related to iPhone or Mac then you are at the right place again. Today, I am going to share a very new feature available on your iOS, iPadOS or macOS using which you can add funds to your Apple ID.
In this modern age, everything is already available in a digital way. You can use your Apple ID on your iPhone to store your wallet, card or whatever you call for payments anywhere in the world. Even, the cryptocurrency is available around the globe for this purpose. Anyhow, we are just going to talk about Apple ID funds you can use for different payments and purchases.
Apple has added a facility for its users using which they can easily pay for apps, in-app purchases and much more. So, are you ready to add funds to your Apple ID because you don’t want to keep your card connected with your Apple ID for purchases? Let’s begin.
How to Add Funds to Apple ID using iPhone or iPad
You can use your iPhone or iPad to add funds to your Apple ID for later use or like savings on your Apple ID.
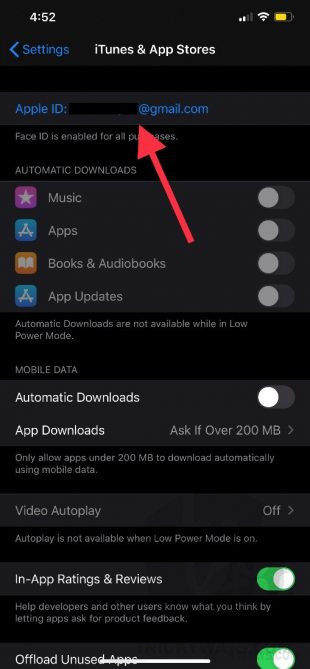
- On your device go to Settings > YOURNAME > iTunes & AppStore.
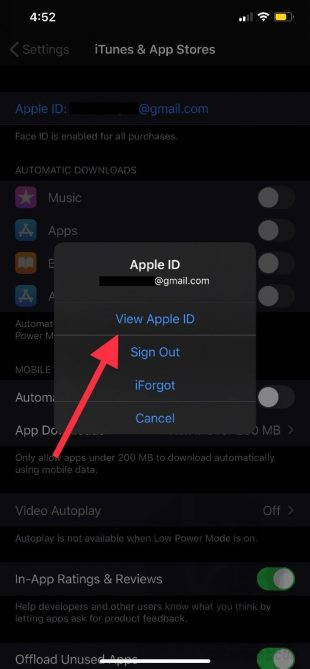
- Tap on your Apple ID & choose View Apple ID.

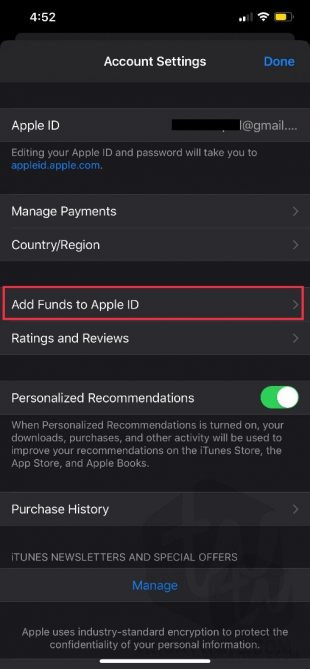
- Hit Add Funds to Apple ID.
- If you don’t have a Payment Method available, hit Add Payment Method.
- Enter the billing details on your account as per requirement.
- Finally, you can select or enter the amount you want to add to your account.


Now you can easily use this amount to buy an application, in-app purchases like gems, UC, Royal Pass or coins and etc. Also, you can buy any subscription using this amount.
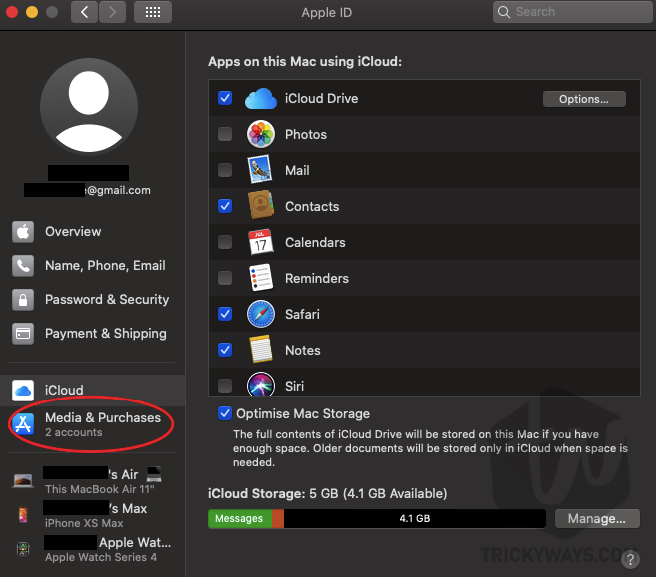
Add Funds to Apple ID using Mac
If you don’t have an iPhone or iPad available then you can use your macOS running device to add these funds to your Apple ID.
- On your Mac, go to Settings App.
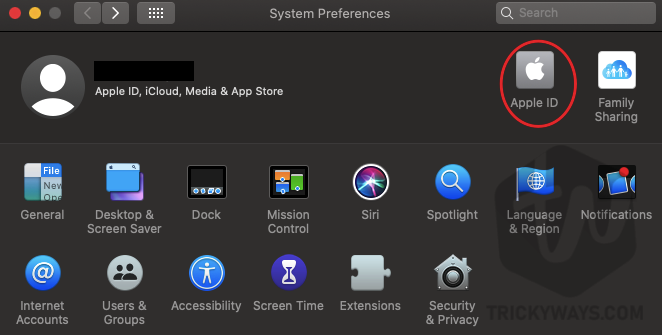
- Hit Apple ID as shown at the top there.

- From the sidebar, hit Media and Purchases.

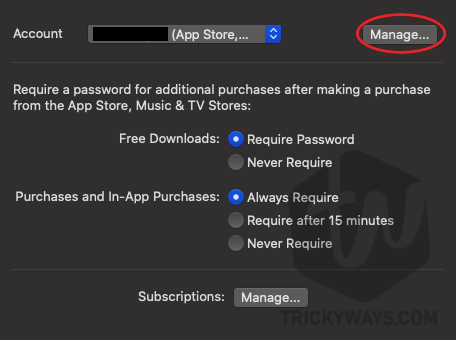
- Make sure the account is for AppStore and then hit Manage button.

- Now, you will be redirected to AppStore with your Apple ID information. Just hit Add Funds to Apple ID.

- Now you can select or enter the amount you want to get on your account.
- Finally, you will able to use this fund for buying music, apps and much more on your mac.


That’s all for today. If you have any issues with adding funds to Apple ID you can share it in the comments below. We will help you, or fix the issue for you. If you like this article, share it with your friends and let them know about this too.
For more exciting content on iPhone, iPad, Apple Watch, & Mac keep visiting us. We share what you are looking for. Keep visiting us and subscribe to our newsletter for push notifications on your device. Signing out, Peace.