Earlier we have written a guide that let you people know how to create PDF file in Mac OS X. This time the guide below will teach you how you can make PDF files password protected on Mac OS X. So, continue reading after the break to know the whole process to create a secure password protected PDF file free in Mac.

Note:
With the same method, you can create PDF in Mac and password protect it by using any application like MS Word, Excel, etc.
Create a Password Protected PDF File in Mac
In this guide we are using TextEdit to demonstrate how to create a password protected PDF. You can use other word processors software like Microsoft Word, Excel, Power Point to save protected PDF using same method.
Step-1
Open any of your files in any application suppose in TextEdit, and then go through the menu “File” > “Print.”

Step-2
Click “PDF” button and select “Save as PDF…” option from the menu.

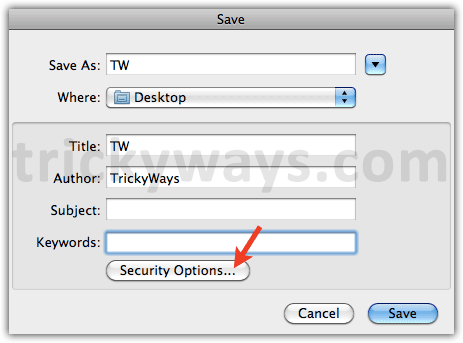
Step-3
Click “Security Options…” button to see the PDF password related options.
Step-4
Here you can select the checkboxes followed by different options according to your requirement by giving and verifying a password to password protect PDF file and then click “OK,” and that’s it
