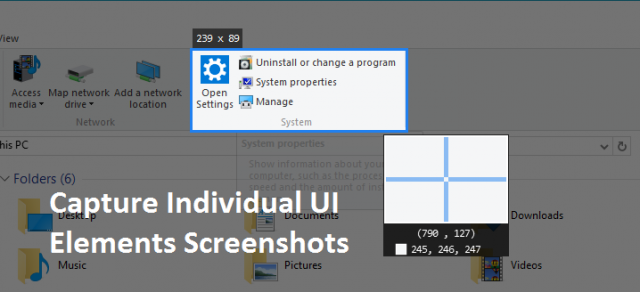
Capturing screenshots and sending it to someone to demonstrate something that is not easy to explain by typing or just in words. You can capture a screenshot of anything showing on your computer screen by just pressing “prt sc” (print screen) button available on your keyboard. “prt sc” will instantly copy the current screen picture to Clipboard. You can paste the captured screenshot to any image/photo or graphics editing tool by pressing Ctrl+V keys combination.
Captured screenshots can be used to demonstrate something, for technical support by showing exact error message and issues. Screenshots are also useful to save snippets of anything you have on your screen that cannot be easily printed. I use them all the time for things I want to refer later, but I won’t necessarily need a printed copy of the image or information.

How to Take screenshot of Individual UI Elements
When it comes to capturing specific element let’s say a menu or section of any window is appearing on the computer screen. Default capturing method is limited to either whole capture screen or active window. You need a tool to capture a specific element from the screen.
There are plenty of paid and free software’s available but meet Snipaste; it’s an open windows app that can grab individual UI elements as a screenshot. It’s a small utility that can capture screenshots from any part of the Window. If you never need to capture screen elements then just go with default screen capture method here, you can check different ways to capture screenshot in Windows.
Just Google it to download Snipaste and run it. It will run in system tray. First checking preferences is a good idea. Right click on its icon from the system tray and click Preferences.
There are four tabs; General will show you the languages, font and theme color for the app and run on system startup.

In Snip tab, you can customize the screenshot capture mode interface. Like detecting windows, and UI elements, etc.

In Paste tab you can set screenshot windows shadow, Zoom in out by Mouse scrolling, image size and auto backup, etc. this app can’t detect any HTML element like input fields, button, etc.

Hotkey Tab, let you set the hotkeys as you need. You can switch to the next UI element using shortcuts.

Screenshot individual UI elements
- First, run Snipaste and press the F1 key from your keyboard. This will activate Snipaste. New hover over your mouse to any windows element, it will highlight the single element or you can also select area according to your need by dragging the mouse.

- Once you have done capturing it will bring you some option where you can save, draw on it and paste to another window as a movable UI element.

You might also want to learn how to take webpage full scroll screenshot.