The terminal allows to capture screenshots after a specific time interval and you can also save a screenshot in some other file formats like JPG, TIFF, etc otherwise by default Mac saves screenshots in PNG format.
How to Take Screen Shot Via Terminal On Mac
Follow the method written below to take a screenshot on Mac by using a command on the terminal.
- Click on Finder

- Go to Applications > Utilities and then launch Terminal

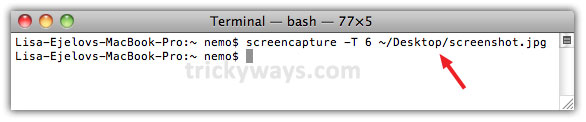
- Type following command in Terminal
screencapture -T 6 ~/Desktop/screenshot.jpg
where: T 6 = time interval in seconds, Desktop = location to save screenshot and screenshot.jpg = filename with extension
By default time interval is set to 5 seconds - To know further details about screencapture command type the following command in the terminal and hit Enter
screencapture --help

As you can see above in the screenshot, there are different options that you can use with the command and perform different tasks. You can use -c to send captured screenshots to the clipboard or use -C to capture the screenshot including the cursor in it. There are lots of options just read and try it.


It works great on mac i try that after reading your article
This is quite easy to take screenshot through command line on mac